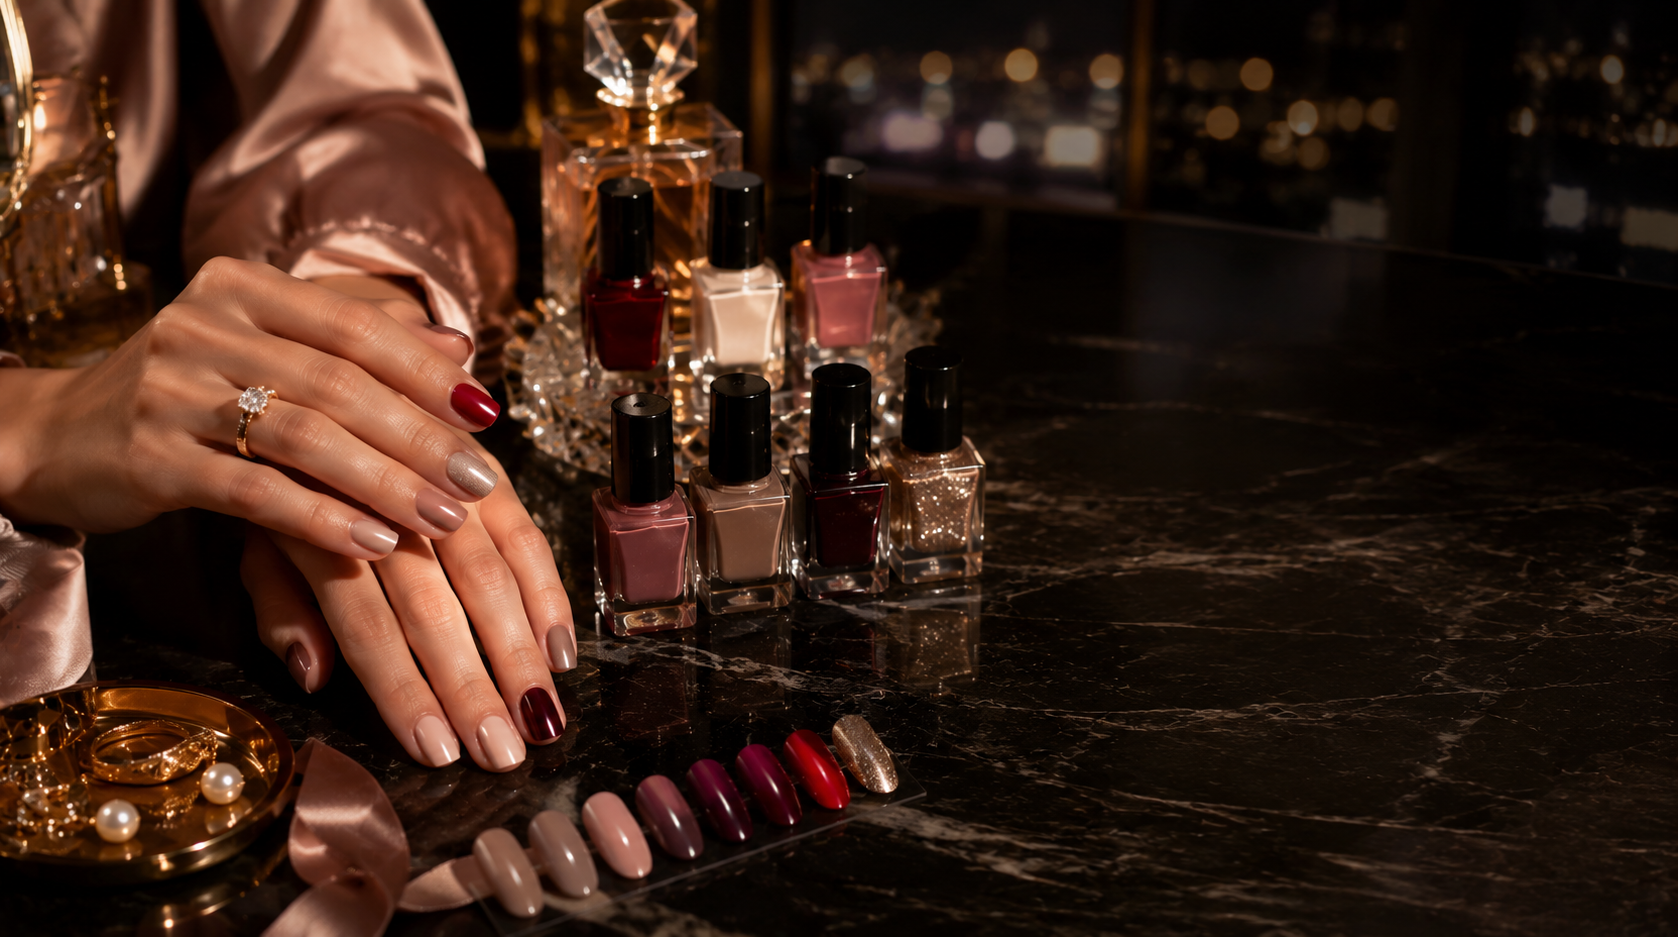
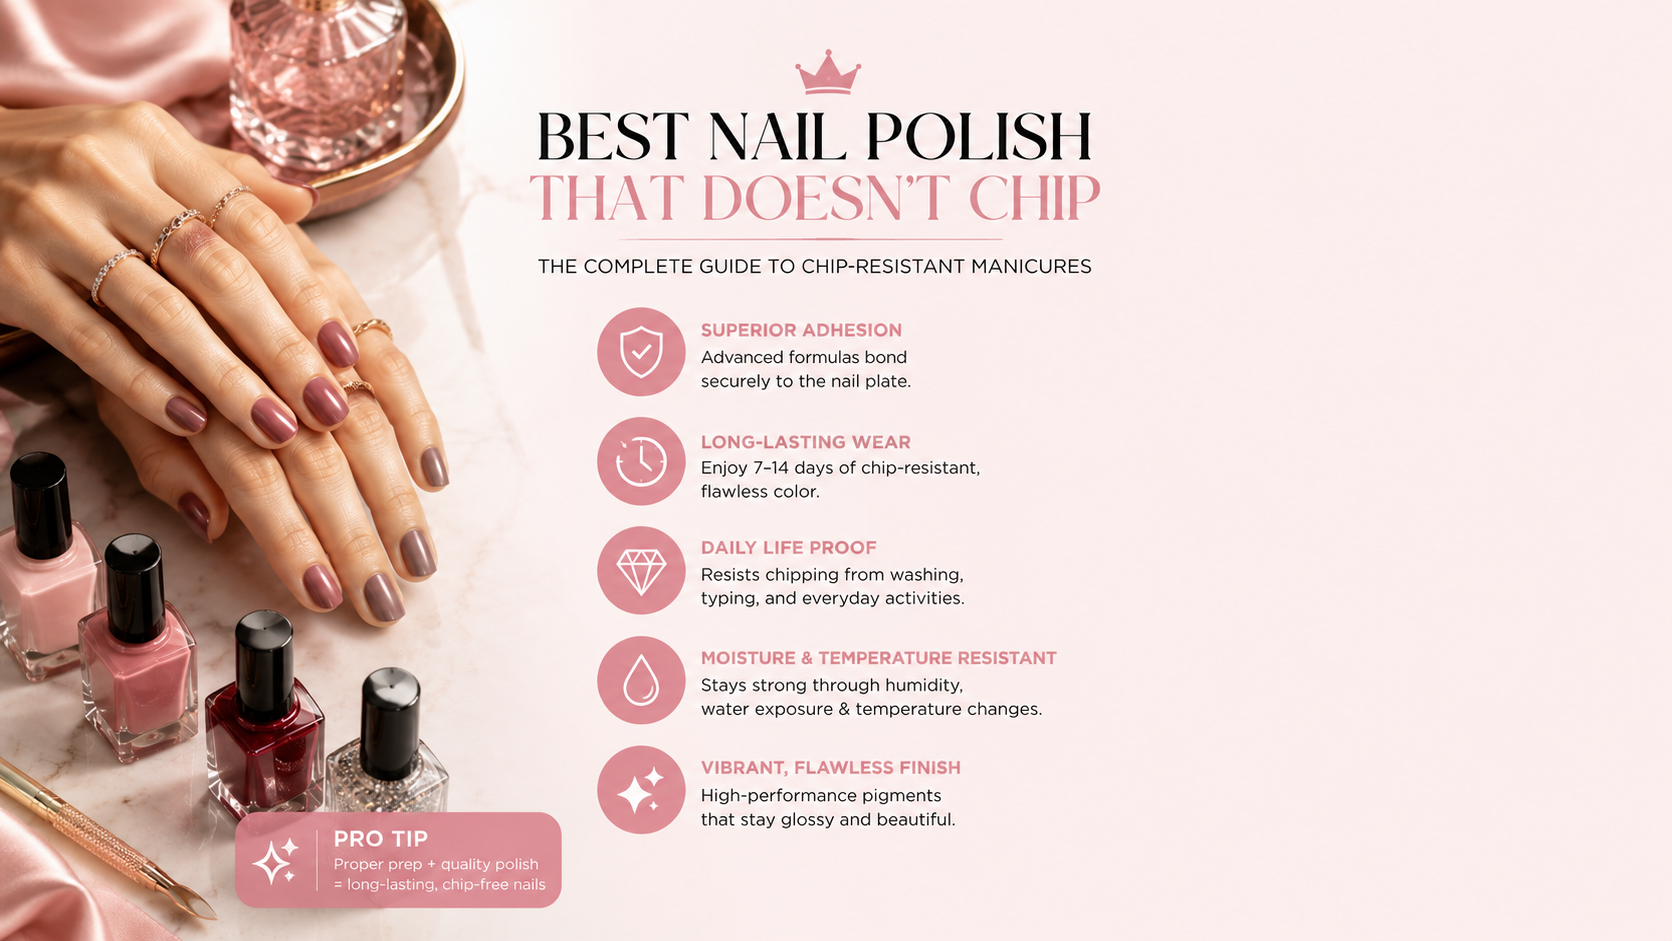
Best Nail Polish That Doesn't Chip: The Complete Guide to Chip-Resistant Manicures
What Is Chip-Resistant Nail Polish?
The frustration is universal: you spend 30 minutes carefully applying the perfect manicure, and within days—sometimes hours—your polish starts chipping. Finding the best nail polish that doesn't chip requires understanding what "chip-resistant" actually means and which products deliver on that promise.
Chip-resistant nail polish is formulated with enhanced adhesion properties, flexible resins, and advanced durability compounds that help the color bond securely to your nail plate and resist breaking, peeling, and flaking under normal daily wear. These polishes are engineered to withstand:
- Daily hand washing without lifting at the edges
- Minor impacts from typing, household tasks, and casual activities
- Temperature changes that cause nail plates to expand and contract
- Moisture exposure that weakens polish bonds
- Friction from contact with clothing, bags, and surfaces
The key distinction: not all "long-lasting" polishes are created equally. Some last 5-7 days with visible chipping by day 3. Others genuinely deliver 10-14 days of wear with minimal edge wear. Understanding the difference between marketing claims and actual performance is essential when searching for the best nail polish that doesn't chip.
Why Nail Polish Chips: Understanding the Root Causes
Before identifying the best nail polish that doesn't chip, you must understand why chipping happens in the first place. Chipping occurs at three distinct stages: before application, during application, or after application. Understanding each helps you select and use the right product correctly.
Pre-Application Issues: The Foundation Problem
The surface beneath your polish is everything. Professional nail technicians attribute 70% of premature chipping to inadequate nail preparation—not to the polish itself.
Natural oils on the nail plate: Your nails secrete natural sebum and oils. While essential for nail health, these oils prevent polish from bonding to the nail plate. When polish cannot adhere properly, it sits on the surface and lifts at the slightest impact.
Moisture and residue: Even tiny amounts of water, dust, or product residue create a barrier between polish and nail. This barrier becomes a breaking point where chips initiate.
Weak or damaged nails: Brittle, peeling, or split nails provide an unreliable base. The keratin structure—the protein giving nails their strength—is compromised in damaged nails. Polish cannot adhere securely to a weakened surface.
Cuticle interference: Cuticles left untouched sit on the nail plate itself. When you apply polish over this cuticle area, the polish bonds to skin rather than nail. Skin naturally sheds, taking the polish with it—this is a primary chipping source many people overlook.
Application Issues: Technique Matters
Even the best nail polish that doesn't chip will fail if application technique is flawed.
Thick coats: Applying one heavy coat instead of two thin coats creates a thicker layer that flexes and peels more easily. Thick polish takes longer to dry completely, and incomplete drying is a major chipping cause.
Skipping base coat: Base coat creates a smooth, adhesive surface for polish. Skipping it means your polish contacts the raw nail plate directly, reducing adhesion significantly.
Insufficient drying time between coats: Even if a coat feels dry on the surface, the interior may still be soft. Applying the next coat before complete drying creates weak bonds between layers.
Uneven application: Drips, thick spots, and thin areas all have different flex properties. Uneven layers chip at different rates and in different areas.
Post-Application Issues: Daily Habits
Even perfect application fails if your post-manicure habits undermine durability.
Immediate water exposure: Applying polish and then immediately washing dishes or showering forces water between the polish and nail plate. This causes lifting and chipping within hours.
Hot water use: Heat opens the pores in your nail plate and softens the polish. Frequent hot water exposure weakens adhesion considerably.
Chemical exposure: Harsh household cleaners, acetone-based products, and other chemicals degrade polish bonds and cause premature chipping.
Excessive friction: Rough handling, scratching, and impact cause visible chips but also create micro-cracks that develop into larger chips.
The Science of Durability: What Makes Polish Last
Understanding what makes the best nail polish that doesn't chip durable helps you identify quality products beyond marketing claims.
Key Formula Components for Durability
Resin content: Quality nail polish contains sophisticated resin blends that provide flexibility and adhesion. Budget polishes use minimal resin, resulting in brittle coatings that chip easily.
Plasticizers: These compounds allow polish to flex slightly with your nail plate rather than shattering when stressed. High-quality plasticizers prevent the rigidity that causes chips.
Adhesion promoters: These compounds act like nano-hooks, helping polish grip the nail plate at a microscopic level. The stronger the adhesion, the longer the wear.
Pigment suspension: How coloring agents are suspended affects both appearance and durability. Well-formulated pigments don't separate or degrade during wear.
Solvent balance: The solvents in nail polish determine viscosity, drying speed, and final hardness. Professional formulations balance these precisely; budget formulations cut corners.
Types of Durability Technologies
Gel-hybrid systems: Some polishes use gel-like polymers that provide gel-like longevity (7-14 days) without requiring UV curing or acetone soaking. Brands like Sally Hansen Miracle Gel and Essie Gel Couture pioneered this category.
Multi-film technology: Advanced polish formulations create multiple ultra-thin films that bond together and to the nail plate, distributing stress across layers rather than concentrating it at breaking points.
Flex-technology: Rather than drying hard and rigid, flex-enhanced polishes dry with slight elasticity, flexing with your nail movements instead of cracking.
Nano-particle reinforcement: Some premium polishes incorporate nano-particles that reinforce the polish structure at a molecular level, dramatically increasing resistance to chipping.
How to Prep Nails: The Professional Protocol
Nail preparation is where the best nail polish that doesn't chip proves its worth. Even premium formulas fail without proper prep. Here's exactly what professionals do:
Step 1: Remove Old Polish Completely
Use a non-acetone or acetone-free polish remover to avoid stripping natural oils. Acetone is a powerful solvent that dries nails significantly, contributing to brittleness and future chipping. If you must use acetone, follow with intensive nail hydration.
Step 2: File and Shape
File nails to your desired shape, always moving in one direction (not back-and-forth sawing). Sawing creates micro-fractures that become chipping points. Use a glass file when possible—they seal the keratin edge better than metal files.
Step 3: Buff the Surface
Gently buff the entire nail surface to:
- Remove shine (helping polish adhere)
- Smooth rough spots
- Create a uniform surface for even polish application
Use light pressure. Aggressive buffing damages the nail plate and weakens adhesion.
Step 4: Push Back Cuticles
Use a wooden or plastic cuticle pusher (never metal, which damages the nail fold). Gently push cuticles back to expose maximum nail plate. Do not cut cuticles—they protect the nail matrix. Healthy cuticles are essential for healthy nail growth and polish adhesion.
Step 5: Trim Excess Cuticle (Optional)
If cuticles are overgrown or thick, carefully trim only the dead skin, never cutting into healthy cuticle tissue.
Step 6: Dehydrate and Cleanse
This step separates professional results from amateur results:
- Wash hands thoroughly with soap and water to remove all oils
- Apply nail dehydrator (or use rubbing alcohol on a cotton pad) and wipe nails completely
- Allow 30 seconds to dry completely
This dehydration is non-negotiable. Professional nail technicians spend significant time on this single step because they understand it's where adhesion is determined.
Step 7: Apply Base Coat (The Game-Changer)
Apply a thin, even base coat. This creates a sticky surface that helps polish adhere and prevents staining. Never skip this step—it's the difference between 5-day wear and 10-day wear.
Cure (if using gel base coat) or allow to dry completely.
Application Techniques: Precision Matters
The Three-Coat Method
Apply your best nail polish that doesn't chip using three thin coats rather than one or two thick coats:
Coat 1 (Color): Apply thin, even strokes covering the entire nail plate. Two strokes down the center, one on each side typically works best. Avoid applying polish over the cuticle area (leave a tiny gap—about 1-2 mm).
Coat 2 (Color): Apply a second thin coat of the same polish, using the same technique. This provides full coverage and deepens the color.
Coat 3 (Top Coat): The top coat is crucial. It:
- Locks in color
- Provides shine
- Creates a protective seal
- Prevents chipping
Apply a thin top coat using the same technique. Cap the free edge (paint a thin line under the nail tip) to seal against breakage.
Drying Time: The Critical Variable
Allowing proper drying time between coats is absolutely essential for the polish to last:
- Between color coats: 3-5 minutes minimum for regular polish (the time it takes for the surface to dry, even though the interior may still be soft)
- Between final color and top coat: 5-7 minutes
- Total drying time before heavy use: 30-60 minutes
Rushing this step is one of the primary reasons nail polish chips prematurely, even when using the best nail polish that doesn't chip. The polish feels dry to the touch but remains soft underneath, and any pressure creates dents and damage that become chipping points.
The Best Nail Polish That Doesn't Chip: Top Product Recommendations
Based on extensive testing and user reviews, here are the standout performers:
Gel-Hybrid Category (7-14 Days Wear)
Sally Hansen Miracle Gel: Delivers 7-10 days with minimal chipping. The formula applies smoothly and provides glossy results without UV curing.
Essie Gel Couture: 5 days on fingers, up to 14 days on toes. Ultra-shiny finish that rivals traditional gel without the removal difficulty.
CND Vinylux: 7-8 days when paired with CND's matching topcoat. A hybrid that sits between regular and gel polish.
Find these and similar gel-hybrid formulas in The Beauty Box gel-like polish collection.
Traditional Long-Lasting Category (5-7 Days)
OPI GelColor: Professional-grade, designed for salons but works at home with proper UV curing.
Deborah Lippmann Gel Lab Pro: 7-10 days with a flawless shine. Slightly longer drying time but exceptional durability.
Chanel Le Vernis: Luxury formula with 5-7 days wear and a prestigious finish.
Browse The Beauty Box nail polish collection for these premium options and additional chip-resistant alternatives.
Budget-Friendly Options (5-7 Days)
Maybelline SuperStay 7 Days: Delivers 7-day wear at drugstore pricing. Comparable to much more expensive polishes.
Revlon ColorStay: Reliable formula with 5-7 days durability and excellent shade variety.
Check The Beauty Box nail polish selections for budget-friendly formulas that don't compromise on durability.
Essential Support Products: Complete the System
Finding the best nail polish that doesn't chip is only half the equation. Support products amplify results dramatically:
Base Coats for Superior Adhesion
Browse base coat options specifically formulated to:
- Prevent staining
- Enhance adhesion
- Provide smoothness
- Reduce lifting
Quality base coats are non-negotiable investments in chip-resistant manicures.
Top Coats for Sealing Protection
Explore top coat formulas that:
- Lock in color
- Add brilliant shine
- Prevent chipping at edges
- Extend wear time by 2-3 days
A quality top coat is essentially a bodyguard for your manicure.
Nail Strengtheners for Healthy Foundation
Weak nails compromise all efforts. Nail treatment products containing:
- Keratin
- Calcium
- Vitamin E
- Biotin
...strengthen the foundation your polish adheres to, indirectly extending wear time.
Dehydrators for Optimal Prep
Nail prep products including:
- Nail dehydrators
- Lint-free wipes
- Alcohol-based cleansers
These are absolutely essential for the optimal adhesion that enables the best nail polish that doesn't chip to perform its best.
Advanced Techniques for Maximum Durability
The Sealing Wrap Method
After applying color coats but before top coat, lightly wrap the brush around the free edge (the white part of your nail). This "caps" the edge, creating a seal that prevents breakage and chipping at this vulnerable spot.
The Thin-Layer Approach
Rather than two coats, apply three ultra-thin coats:
- Coat 1: Thin color
- Coat 2: Thin color
- Coat 3: Thin color
- Coat 4: Thin top coat
Multiple thin layers distribute stress better than fewer thick layers, extending wear significantly.
The Buffer Layer System
Some professionals apply:
- Base coat
- Thin clear polish layer (acts as a buffer)
- Color (two thin coats)
- Top coat
The clear buffer layer adds flexibility and reduces direct contact between color and nail plate.
Moisture Protection Post-Application
Wait minimum 30 minutes before:
- Washing hands
- Exposing nails to water
- Using harsh chemicals
This allows polish to cure properly throughout all layers.
Frequently Asked Questions: Best Nail Polish That Doesn't Chip
FAQ 1: Why Does My Nail Polish Chip Within Days Even When Using Quality Products?
Nail polish chipping is caused by issues at one of three stages: before, during, or after application.
Before application: Inadequate nail prep is the #1 cause. Oil on the nail plate prevents adhesion. Professional solution: dehydrate nails thoroughly with rubbing alcohol before base coat application.
During application: Skipping base coat, thick coats, or insufficient drying time between coats compromises durability. Solution: always use base coat, apply thin coats, wait minimum 3-5 minutes between layers.
After application: Immediate water exposure, hot water use, or rough handling weakens adhesion. Solution: wait 30-60 minutes before heavy hand use or water exposure.
Most people produce chipping through technique, not product choice. Even the best nail polish that doesn't chip cannot overcome poor preparation or application.
FAQ 2: Is Gel Polish Better Than Regular Polish for Preventing Chipping?
Yes, traditional gel polish significantly outperforms regular polish for chip resistance:
Regular polish: 5-7 days wear typical, with visible edge chipping common by day 3-4
Gel hybrid polish: 7-10 days without chipping, though removal is easier than traditional gel
Traditional gel polish: 10-14 days with minimal chipping, but requires UV curing and difficult removal
Gel X extensions: 2-4 weeks wear with excellent chip resistance, ideal for those wanting length
The trade-off: gel polish requires UV exposure and acetone soaking for removal, which can damage nails with repeated use. Traditional polish is easier to use and remove but chips faster.
For the best nail polish that doesn't chip without gel complications, gel-hybrid formulas (Sally Hansen Miracle Gel, Essie Gel Couture) provide 7-10 day wear that's genuinely impressive for non-gel products.
FAQ 3: What's the Difference Between "Long-Lasting" and "Chip-Resistant" Polish?
These terms are often used interchangeably but have subtle differences:
Long-lasting polish: Maintains color and shine for extended periods (7+ days) without significant fading
Chip-resistant polish: Resists mechanical breakage and edge wear that creates visible chips
A polish can be long-lasting but chip easily (color stays vibrant but edges peel). The best nail polish that doesn't chip is both long-lasting AND chip-resistant—maintaining color while resisting mechanical failure.
Look for products that specifically mention:
- Extended wear time (7+ days)
- Chip resistance
- Edge sealing
- Flexible formula
- Adhesion technology
FAQ 4: How Do You Know If a Polish Is Actually Chip-Resistant or Just Marketing Hype?
Brand claims aren't reliable; real-world testing is. Evaluate polish quality by:
User reviews: Look for reviews specifically mentioning wear duration and chipping. Consistent reports of 7+ day wear without chips indicate genuine durability.
Ingredient list: Quality polishes contain resins, plasticizers, and adhesion promoters. Budget polishes list minimal resins.
Price point: While not determinative, extremely cheap polish ($1-2) typically cannot contain the sophisticated resin systems that enable true chip resistance.
Professional use: If salons recommend or use a brand, it's likely genuinely durable.
Consistency across reviews: One glowing review doesn't mean much, but dozens of consistent 4-5 star reviews citing specific wear time (e.g., "lasts 10 days") indicates genuine performance.
The best nail polish that doesn't chip typically has:
- 4.5+ star average rating
- Multiple reviews specifically mentioning durability (not just color)
- Consistent reports of 7+ day wear
- Users comparing it favorably to gel
FAQ 5: Can Using the Right Top Coat Actually Extend Polish Wear Time?
Absolutely. Top coat can add 2-3 days of wear to your manicure:
Quality top coats: Seal the color, provide shine, and create a protective barrier. They prevent tip wear that becomes chipping.
Matching brand systems: Using a polish brand's matching top coat (e.g., Sally Hansen Miracle Gel with Sally Hansen top coat) optimizes the system.
Reapplication advantage: Reapplying just the top coat after 5-7 days extends total wear another 3-5 days without reapplying color.
Professional tip: Many nail technicians keep a top coat brush in their kit specifically for mid-week touch-ups.
The best nail polish that doesn't chip becomes even better when paired with a quality matching top coat.
FAQ 6: What Should You Do If Your Nails Are Weak or Brittle? Should You Still Wear Polish?
Weak, brittle nails benefit from intentional nail care before returning to polish:
Assess the damage: Peeling, splitting, or extreme brittleness indicates keratin protein deficiency or damage.
Take a break: Professional nail technicians recommend 4-8 weeks without polish or gel while nails recover.
Use nail strengtheners: Nail treatment products containing keratin, biotin, and vitamins help restore nail health.
Address underlying causes:
- Vitamin/mineral deficiency (zinc, iron, B vitamins)
- Chronic dehydration
- Acetone exposure from nail polish remover
- Harsh chemicals or excessive water exposure
Return to polish carefully: Once nails recover, choose the best nail polish that doesn't chip and follow meticulous prep and application protocol.
Trying to wear polish on damaged nails only perpetuates damage. Invest in nail health first, then enjoy polish wear without guilt.
Troubleshooting: Why Your Best Efforts Still Chip
Issue: Chipping at Tips Only
Cause: Insufficient edge sealing (not capping the free edge) or excessive impact
Solution:
- Cap the edge with every coat (paint a line under the nail tip)
- Use a strengthened top coat designed for edge protection
- Consider slightly shorter nail length to reduce leverage stress
Issue: Chipping Along the Sides
Cause: Cuticle area not properly prepared, causing lifting from the cuticle up
Solution:
- Ensure full cuticle removal and expose maximum nail plate
- Leave a 1-2 mm gap between polish and cuticle during application
- Use a base coat with adhesion promoters
Issue: Peeling in Sheets
Cause: Base coat skipped, insufficient adhesion from nail prep
Solution:
- Never skip base coat
- Dehydrate nails more thoroughly (use alcohol and wait longer)
- Switch to a base coat known for superior adhesion
Issue: Cracking and Flaking Across the Surface
Cause: Polish is too thick or has poor flex properties
Solution:
- Apply thinner coats
- Choose polish with flex technology specifically
- Allow longer drying time between coats
The Complete System: Putting It All Together
Finding the best nail polish that doesn't chip is part of a complete system:
✓ Preparation: Dehydrate nails, manage cuticles, buff surface
✓ Base coat: Always use, never skip
✓ Color application: Three thin coats, not two thick coats
✓ Proper drying: 3-5 minutes between coats, 30+ minutes before use
✓ Top coat: Quality product, properly capped edges
✓ Post-manicure care: Avoid water and harsh chemicals initially
✓ Daily habits: Limit heat exposure, avoid excessive friction
✓ Mid-week maintenance: Reapply top coat if chipping starts
Master this system and even mid-range polishes perform beautifully. Ignore any step and even premium products fail.
Frequently Overlooked Prevention Strategies
Protect Against Acetone
Acetone-based removers are highly effective but dry nails severely. After using acetone remover:
- Wash nails with soap and water
- Apply cuticle oil and hand cream
- Wait 24+ hours before reapplying polish
- Consider acetone-free removers for regular use
Manage Daily Water Exposure
Excessive water exposure weakens polish bonds:
- Wear gloves while washing dishes
- Limit time in hot water/baths
- Dry nails immediately after any water exposure
Use Hand Cream Strategically
Hand cream shouldn't touch freshly applied polish (oils prevent adhesion), but regular application afterward prevents dryness that contributes to brittle nails.
Consider Acetone-Free Polish for Sensitive Nails
If your nails are particularly weak or you remove polish frequently, acetone-free polish still provides decent durability while being gentler on nail health.
Mastering the Best Nail Polish That Doesn't Chip
The best nail polish that doesn't chip exists—but its success depends entirely on your preparation, application, and aftercare. Premium formulations excel, but technique matters more than product choice.
Start with quality products from The Beauty Box nail polish collection, but invest equal effort in mastering the system outlined in this guide. Master the fundamentals:
- Preparation (dehydration is key)
- Base coat (never skip)
- Thin coats (never thick)
- Proper drying (patience matters)
- Quality top coat (your manicure's guardian)
- Post-application care (avoid water immediately)
- Daily habits (protect your investment)
Follow this protocol and you'll achieve 7-10 day wear from regular polish and 10-14+ days from gel-hybrid or gel formulas—genuine chip-free manicures you'll love wearing.