Gel Nail Polish That Lasts 3 Weeks: The Honest Guide to Getting It Right
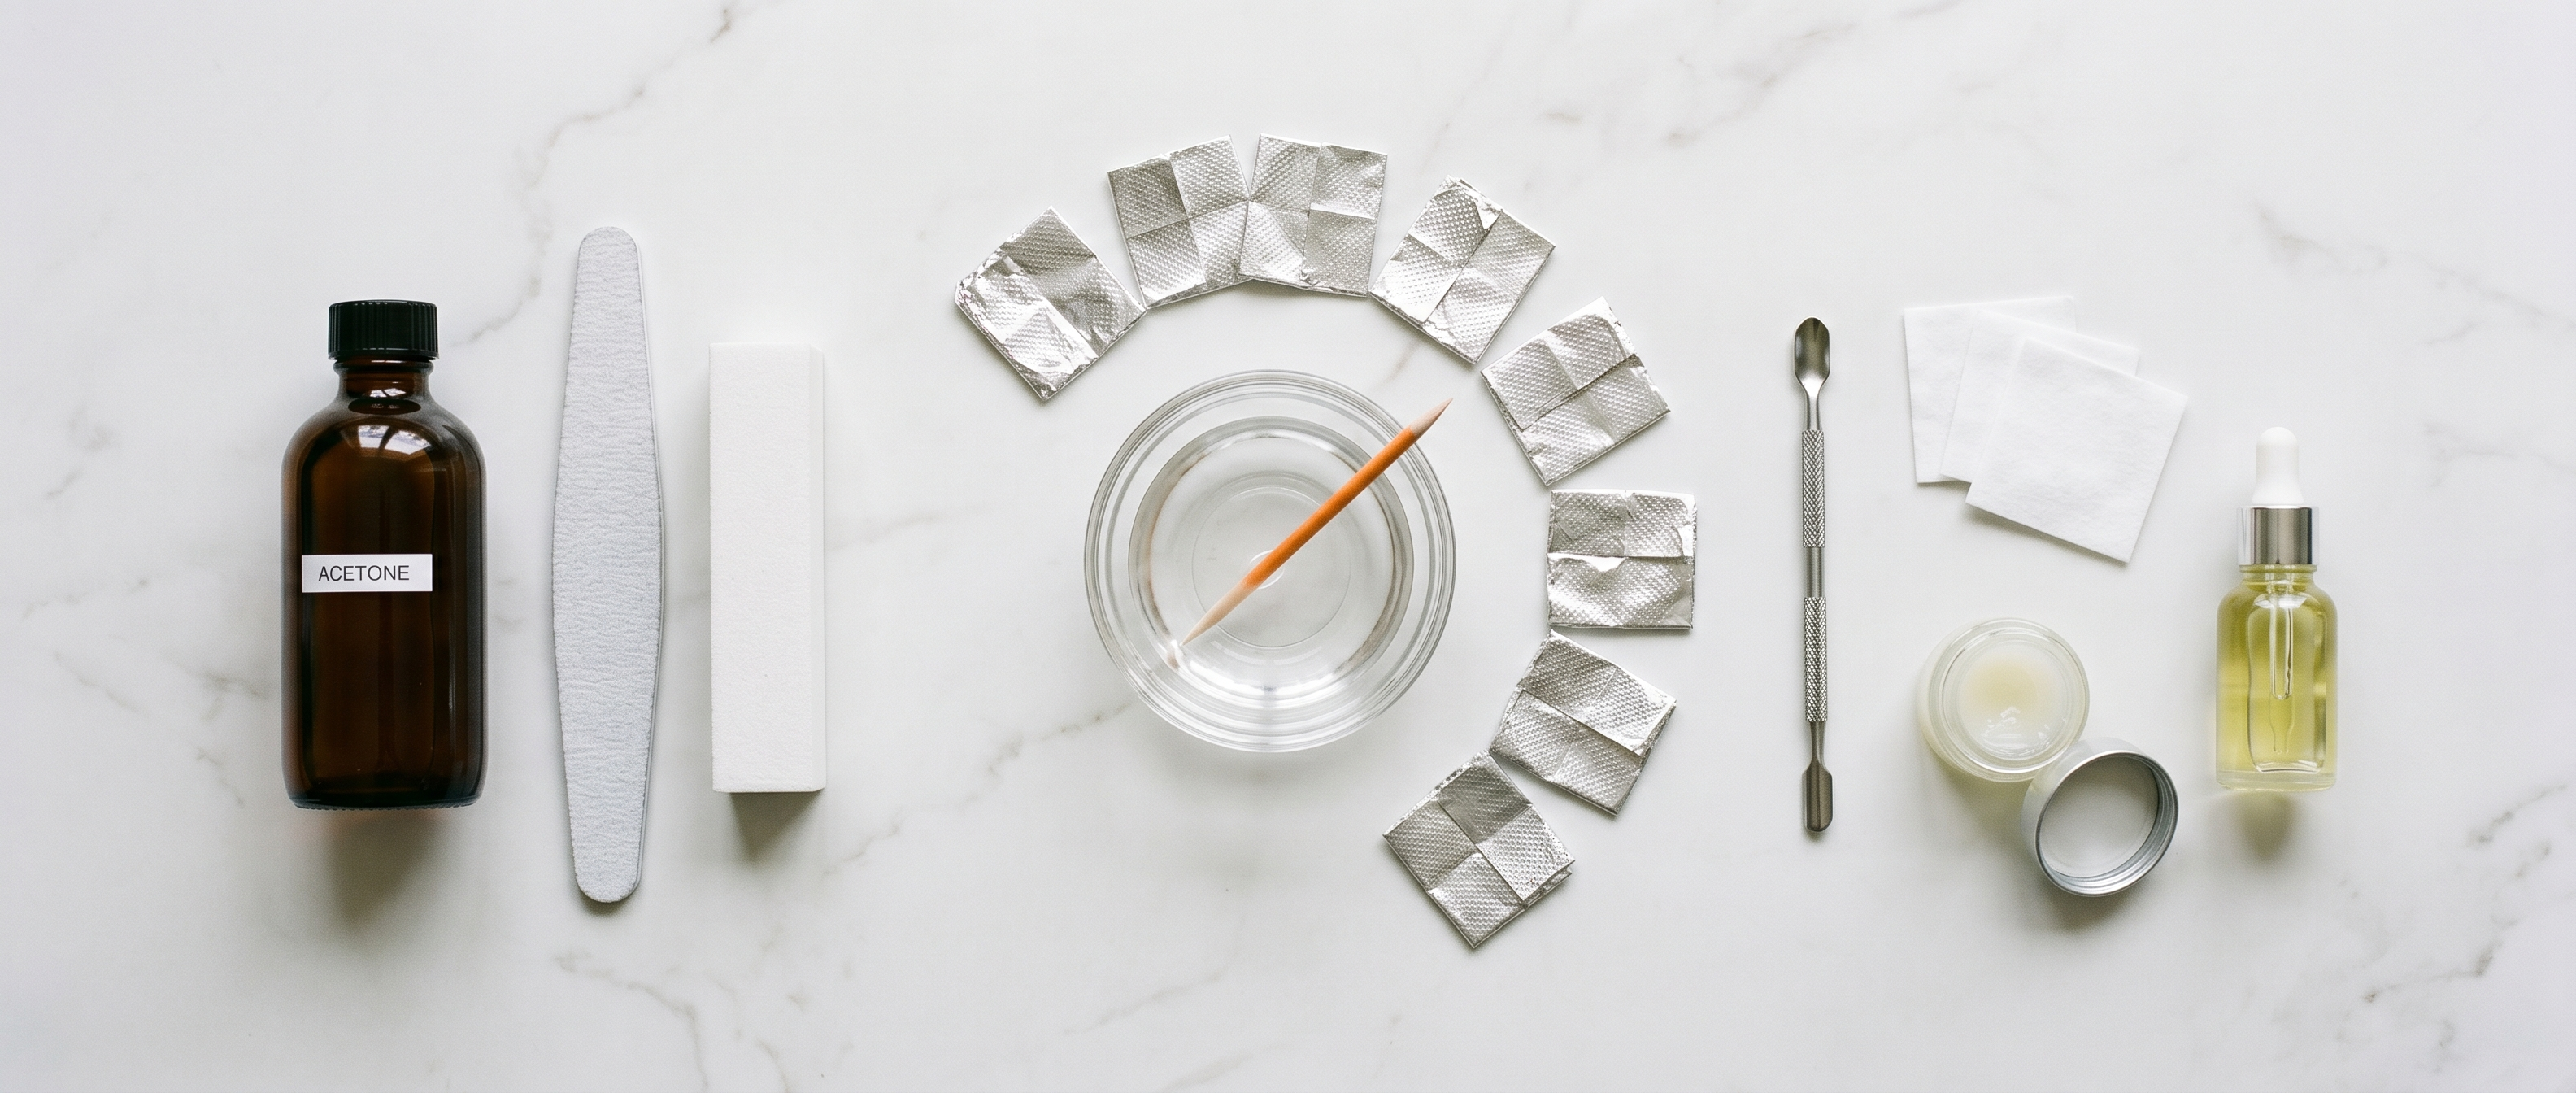
Most gel polish failures are not product failures. They're prep failures — and nobody sells prep. Brands have every incentive to tell you their formula lasts longer than the competitor's. None of them have an incentive to tell you that a $4 bottle of isopropyl alcohol and two minutes of nail prep is responsible for 80% of whether your manicure survives the first week.
The standard for gel nail polish that lasts 3 weeks is achievable with almost any professional-grade formula — Kiara Sky, LeChat, Chaun Legend, and others stocked at The Beauty Box all hit this benchmark when applied correctly. The variable is not primarily brand. It is surface preparation, coat thickness, cure time, and one step that most home users systematically skip: capping the free edge.
This guide covers exactly what it takes to get gel nail polish that lasts 3 weeks at home or in a salon — the prep protocol, the product choices that actually affect longevity, the application technique points that move the needle, and what to do when it still fails early.
Why Most Gel Polish Fails Before Three Weeks
The industry benchmark for professional gel polish is three weeks of chip-free wear. The four brands stocked most heavily in the gel polish collection at The Beauty Box — Kiara Sky, LeChat, Chaun Legend, and Revel Nail — all meet that standard under laboratory conditions. Real-world wear time is shorter for most users, and the gap between lab conditions and real results comes down to five causes almost every time.
Cause 1: Oil Contamination at the Nail Plate
The natural oils that keep skin supple are gel's primary enemy. If any oil is present on the nail plate surface when base coat is applied, the gel is bonding to oil rather than to the nail. That bond fails. The oil doesn't have to be visible — residual hand cream absorbed hours earlier can leave a film thin enough to be invisible but thick enough to prevent proper adhesion.
The fix is a dehydrator — a pH-reducing, oil-removing liquid applied with a lint-free pad before base coat. Isopropyl alcohol at 90%+ concentration achieves the same result. Either approach removes the contamination window. Do this even if you've just washed your hands: dish soap leaves a residue that isopropyl alcohol removes, but water and regular hand soap do not fully degrease the nail plate.
Cause 2: Thick Coat Application
Thick gel coats do not cure from the outside in. They cure from the surface down, meaning a thick layer cures on top but leaves a semi-reactive layer underneath that never fully hardens. That under-cured layer stays flexible, moves with the nail, and eventually separates. The counter-intuitive reality of gel application is that two thin coats are more durable than one thick coat — less product, longer wear.
Cause 3: Under-Curing
LED lamp wattage degrades over time. A lamp that cured gel correctly two years ago may not be delivering the same output today. Gel that appears cured to the eye — no visible tacky layer after the wipe step — can still be under-cured at deeper layers where the light didn't fully penetrate. Under-cured gel stays reactive, which accelerates both wear failure and, for formulas containing acrylate sensitizers, sensitization risk.
The minimum lamp standard for professional gel systems in 2026 is 48W LED with dual wavelength output (365nm + 405nm). The nail lamp collection at The Beauty Box carries 17 options from entry-level through the Kiara Sky Beyond Pro Rechargeable LED Lamp Vol. II — which is the recommended pairing for the Kiara Sky Gel Pro and standard soak-off range.
Cause 4: Skipping the Free Edge Cap
The free edge of the nail — the very tip — is where gel polish chips begin for most people. Applying gel up to but not over the tip leaves an unsealed edge that catches on fabric, absorbs water, and peels away from the tip inward. Capping the free edge means running the gel brush along the nail tip at each coat — base coat, colour coats, top coat — to seal the edge completely. It adds 15 seconds to each nail. It extends wear by days.
Cause 5: Skin Flooding
Gel polish applied onto the skin surrounding the nail creates a weak anchor point. When the skin flexes (which it does constantly), the gel at the skin contact point lifts, creating a gap at the cuticle line that widens over days. The rule is 1–1.5mm clearance from all skin at every coat. This clearance is maintained by application technique — a light hand, a controlled brush movement, and cuticle preparation before application begins.
The Prep Protocol That Makes Gel Polish Last 3 Weeks
This is the protocol that separates a gel nail polish that lasts 3 weeks from one that peels by day seven. Each step has a specific function. None are optional if the goal is maximum longevity.
Step 1: Push and Clean the Cuticle Line
Use a metal or wooden cuticle pusher to push the cuticle back from the nail plate. Remove any dead skin overlay from the nail surface — this skin layer is the most common site of gel separation because gel cannot bond to dead tissue. The nail accessories collection at The Beauty Box carries cuticle pushers, dotting tools, and prep equipment for this step.
Step 2: Shape and Buff the Nail Plate
File the nail to the desired shape, then lightly buff the nail plate surface with a 180-grit buffer. The buffing step creates micro-texture on the nail surface — giving the base coat physical ridges to grip rather than a smooth, naturally-oiled surface. The nail file collection at The Beauty Box includes glass files, 4-way buffers, and graded emery boards for each stage of prep.
Don't over-buff. A light pass with a 180-grit buffer — three or four strokes across each nail — is sufficient. Over-buffing thins the nail plate, which weakens the structural foundation for the gel and increases the risk of damage during removal. The goal is surface texture, not visible scratches.
Step 3: Dehydrate
Apply a dehydrator (or 90%+ isopropyl alcohol) to each nail with a lint-free pad. Do not touch the nail plate after this step — skin oils transfer immediately. Let the dehydrator evaporate fully before moving to the next step. The evaporation takes less than 30 seconds.
Step 4: Prime
Apply a nail primer. Primer creates a chemical bond layer between the natural nail and the base coat — a molecular bridge that neither dehydrator nor buffer alone provides. For natural nails, a non-acid primer is sufficient. For clients with consistently oily nails or a history of gel lifting, an acid primer applied sparingly to the nail plate (avoiding skin contact) provides stronger adhesion. Check the top and base coat collection for compatible primers.
Step 5: Thin Base Coat, Full Cure
Apply a thin, even base coat. Thin is the operative word — a thick base coat creates an uneven foundation that makes colour coats prone to uneven adhesion. Cure for the full manufacturer-recommended time. With a 48W LED lamp, most professional base coats cure in 30–60 seconds. Do not rush this step: a partially cured base coat is a peeling base coat.
Pro tip: Apply base coat to the free edge of each nail before sweeping across the nail plate. Starting at the tip ensures the most important seal point is covered before the brush load depletes.
Application Technique: The Details That Add Days
Coat Thickness
The calibration for "thin coat" is: load the brush, wipe one side of the bristles on the bottle neck to remove excess, and apply. The result should be a coat that levels itself in 5–10 seconds without appearing watery. If the product is still moving after 10 seconds, it's too thick. If it's dragging rather than flowing, it's too thin.
The Cap Technique in Practice
After applying each coat across the nail plate, hold the brush flat against the nail tip and draw it along the edge in a single motion. The goal is a thin film that wraps slightly under the tip. This sealed edge is what makes gel nail polish last 3 weeks for people who work with their hands — not the formula, but the edge seal.
Cure Time is Not Approximate
Cure time is the manufacturer's tested minimum for full polymerisation at a specific wattage. Every variable that reduces effective lamp output — older bulbs, shading from curved nail surfaces, distance between nail and lamp, coat thickness — increases the actual cure time needed. When in doubt, cure 10–15 seconds longer than the stated minimum. The only downside of over-curing standard gel is none. The downside of under-curing is early wear failure and, for some formulas, sensitization risk.
Which Products Actually Affect Longevity
Not every product choice has the same impact on whether you achieve gel nail polish that lasts 3 weeks. Here's what actually moves the needle, ranked by impact.
1. The Base Coat — Highest Impact
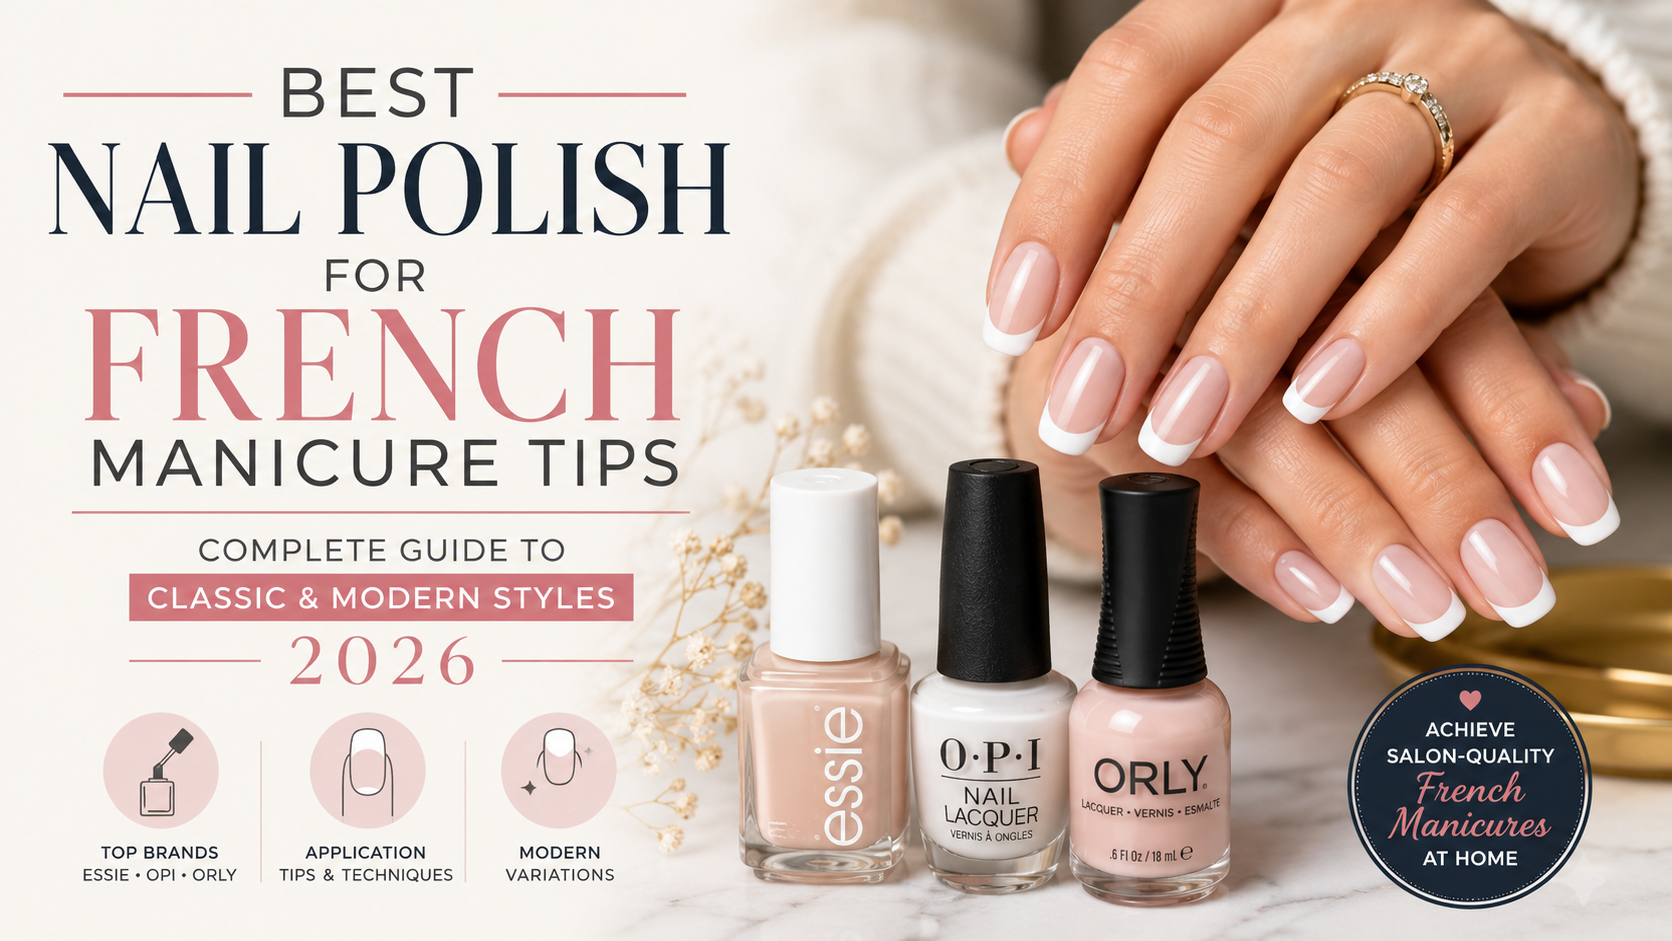
The base coat is the adhesion layer. Nothing else in the system compensates for a weak base coat. In professional gel systems, a rubber base coat provides stronger adhesion than a standard thin base coat because the rubber formula has more molecular surface area for bonding. For clients with oily nails, a rubber base coat is the single most reliable wear-extension tool available.
The top and base coat collection at The Beauty Box carries 33 products including rubber base options, bonding bases, and the Kiara Sky Essentials LED/UV Top Coat — a non-wipe formula that seals with no yellowing, bubbling, or chipping and adds structural strength to gel, acrylic, and dip applications.
2. The Top Coat — Second Highest Impact
The top coat seals the colour, provides surface hardness, and protects against UV-induced colour fade. A non-wipe top coat cures to a fully hard, scratch-resistant surface without requiring an alcohol wipe step, which simplifies the application and reduces the risk of disturbing the underlying cured gel. A matte top coat must be refreshed more frequently as the matte surface abrades faster than gloss.
Customer reviews for The Beauty Box's Glossy Top Coat consistently note it keeps nails glossy for the entire wear time — direct evidence that top coat selection affects the longevity of the visual result, even when the gel underneath remains intact.
3. The Gel Colour Formula — Third Place
Professional-grade gel polish formulas differ from budget formulas in pigment quality, viscosity calibration, and cure response. The brands in the gel polish collection at The Beauty Box — Kiara Sky, LeChat Perfect Match, Chaun Legend, and Revel Nail — are all professional-grade formulas that achieve the three-week benchmark when applied correctly.
Kiara Sky's standard soak-off range and HEMA-free Gel Pro line deliver full coverage in two thin coats with consistent colour accuracy. LeChat Perfect Match's dual-system gel applies evenly without running or shrinking and maintains wear time equivalent to Kiara Sky's standard line. Chaun Legend's LGND UV Gel Polish is formulated for rich pigmentation in a single coat — a time-saving advantage for professional services without sacrificing three-week longevity.
Browse brand-specific options:
-
Kiara Sky gel polish collection — 430+ SKUs including standard soak-off, HEMA-free, Magnetic FX, Diamond FX, and Jelly Tints
-
Chaun Legend Signature Must-Haves Collection — 6-piece professional essentials for salon use
-
Chaun Legend Fall Must-Haves Collection — warm autumnal palette with the same LGND formula
4. The Lamp — Often Overlooked, Often Responsible
Most early wear failures attributed to product are actually lamp failures. A lamp delivering insufficient wattage, degraded LED output, or incorrect wavelength produces under-cured gel that wears and lifts prematurely. The nail lamp collection at The Beauty Box carries 17 options — from compact entry-level LED lamps through the Kiara Sky Beyond Pro Rechargeable Vol. II for professional use. Match the lamp wattage to the manufacturer's stated minimum for the gel brand being used. For most professional-grade gels, 48W is the standard.
Getting Gel Polish to Last 3 Weeks: Scenarios and Solutions
For At-Home Users Starting with Gel
The two highest-value investments for a first gel setup are: a quality rubber base coat and a 48W LED lamp. Everything else — colour, top coat, tools — can be upgraded incrementally. Get these two right first.
For a complete beginner kit, the gel kits collection at The Beauty Box includes complete starter sets from Kiara Sky and Chaun Legend with lamp, base, colour, and top coat in one purchase — removing the compatibility guesswork that comes from assembling a multi-brand kit.
For Users Who Consistently Fail at Week One
Week one failures are almost always prep problems. Run this diagnostic before changing products:
-
Are you using a dehydrator or 90% isopropyl alcohol before base coat? No → Add this step first. It is the most common missing step.
-
Are you touching the nail plate after dehydrating? Yes → Stop. Oils transfer from fingertips in less than 10 seconds.
-
Is your base coat thin? Uncertain → Wipe one side of the brush on the bottle neck before application to remove the excess product that causes thick coats.
-
Are you capping the free edge? No → Add this at every coat. Week-one tip peeling is almost always an unsealed free edge.
-
How old is your LED lamp? Over 3 years old → Consider replacing or at minimum testing with a different lamp. LED output degrades with use.
For Users Who Fail at Week Two
Week two failures are typically either lifting at the cuticle line or tip chipping. Cuticle lifting indicates either skin flooding during application (gel touching skin creates the lift point) or insufficient primer. Tip chipping indicates the free edge seal is incomplete — check that the top coat cap step is reaching fully under the tip, not just the surface of the edge.
For Nail Technicians with Inconsistent Client Wear
Inconsistent wear across clients with the same product almost always traces to: (1) cuticle and skin prep being inconsistent between clients — some have more dead skin overlay, some have oilier nails; (2) coat thickness varying with fatigue during long service days; (3) lamp positioning — curved nails or thicker middle fingers sitting further from the lamp centre. Standardising the dehydrator step, maintaining thin coat discipline, and checking that every nail surface is within the manufacturer's recommended distance from the lamp resolves most inconsistency.
Nail Health and Long-Term Gel Wear
Achieving gel nail polish that lasts 3 weeks consistently over time requires maintaining the health of the natural nail underneath. Gel applied to damaged, thinned, or dehydrated nails will lift and fail — not because the formula is wrong, but because the substrate is compromised.
Between-Service Nail Recovery
When gel is removed — correctly, via acetone soak-off without force — the nail surface is typically dehydrated and slightly more porous than a never-gelled nail. A two to three day recovery window before reapplication, using a nail strengthener or cuticle oil, allows the plate to rehydrate and firm up. This is not required for every client, but for those who do continuous gel rotations with short turnaround, a recovery protocol extends the longevity of each subsequent application.
The nail treatment collection at The Beauty Box carries 69 products for nail strengthening, cuticle care, and recovery: Nailtiques Formula 2, Nail Tek strengthening base coats, IBD treatment products, and cuticle oils. Regular cuticle oil application between gel services maintains the flexibility of the nail plate and reduces stress cracking that contributes to early gel failure.
Correct Removal: The Last Line of Defence
Forcing or peeling gel off the nail plate removes the topmost layer of the nail with it. Each improper removal thins and weakens the nail plate, making the next application adhere less well — creating a cycle where each set lifts faster than the last. Correct soak-off takes 10–15 minutes with an acetone-saturated lint-free pad wrapped in foil. The gel then slides off without force. If it requires pressure, it needs more soak time.
For professional removal at home, the nail drills and bits collection at The Beauty Box includes the Kiara Sky Beyond PRO Drill and a 17-piece bit collection for gentle surface file-down before acetone soak — a technique that reduces soak time and minimises acetone contact for clients with sensitive skin.
Gel Polish Longevity: What Affects Each Week
|
Time Period |
What Causes Failure at This Stage |
How to Prevent It |
|---|---|---|
|
Days 1–3 |
Oil contamination at nail plate; thick base coat; skin flooding at cuticle line |
Full dehydrator + primer protocol; thin base coat; strict 1–1.5mm skin clearance |
|
Days 4–7 |
Under-cured layers peeling; unsealed free edge starting to chip at tips; degraded lamp output |
Full cure at every layer; cap free edge at base, colour, and top coat; verify lamp wattage |
|
Days 8–14 |
Cuticle-line lifting; coat shrinkage from incorrect application; top coat abrasion |
Rubber base coat; avoid thick colour coats; refresh top coat if visible matte or dull patches appear |
|
Days 15–21 |
Natural nail growth making application look grown-out; normal surface wear at tip; edge chip if free edge cap incomplete |
This is wear time success — refill or new application at 3 weeks; maintain free edge seal at colour coat level |
|
Day 21+ |
Formula adhesion limit on most products; nail plate flexion; normal service end point |
Book refill; correct soak-off removal; recover nail before reapplication |
Frequently Asked Questions
Does gel polish type affect how long it lasts?
Yes, marginally. HEMA-free gel polishes from current-generation brands (Kiara Sky Gel Pro) perform at parity with conventional gel for wear time — the safety-performance trade-off of early HEMA-free formulas no longer applies. Hard gel lasts longer than soak-off gel but requires mechanical removal, which carries a higher damage risk. Soak-off gel (the format this guide covers) is the professional standard for colour services at three weeks of wear.
Why does my gel polish last longer in winter than summer?
Heat accelerates the expansion of the nail plate, which causes microscopic flexion that stresses the gel bond at the edges. Summer activities — swimming, frequent hand washing, sunscreen application — also introduce water, chlorine, and oil to the nail surface. For clients who consistently see shorter wear in warm months, a rubber base coat, increased primer use, and refreshed top coat (applied at home at the 10-day mark) compensates for the seasonal wear acceleration.
Can I use any base coat with any gel polish?
Technically yes — professional gel systems are not fully closed systems. However, adhesion is most reliable and predictable when the base coat is formulated for the same gel line. Mixing brands introduces adhesion variables that complicate diagnosis when lifting occurs. For the most consistent three-week wear, use the manufacturer's recommended base coat system and check the top and base coat collection at The Beauty Box for compatible pairings.
How often should I replace my LED lamp?
LED lamp output degrades with use. Most professional LED lamps maintain effective output for 50,000+ hours of use under ideal conditions, but real-world use — frequent on/off cycles, heat exposure, power fluctuations — reduces effective lifespan. If your gel polish started lifting more than it did 18 months ago with the same products and technique, a lamp replacement is worth testing before changing formula. The nail lamp collection at The Beauty Box carries 17 options at multiple price points.
Is rubber base coat worth it?
For most people, yes. Rubber base coat provides better adhesion than standard thin base coat, particularly on oily nail plates, because the elastomeric formula has more surface contact area than a thin film. The additional flexibility also reduces lifting at the cuticle line caused by natural nail growth and flexion. For clients with a history of early gel failure despite correct prep, switching to a rubber base coat is the highest-yield product change available.
What's the fastest way to check if my gel is properly cured?
The industry standard check is the inhibition layer test: after removing the lamp, touch the nail surface before any alcohol wipe step. If it feels sticky or tacky, the surface inhibition layer is present, which is normal for most gel formulas. But if it feels soft, compressible, or leaves an indent under light pressure, the layer underneath has not fully cured. Cure again and recheck. A fully cured gel surface under a non-wipe top coat should feel completely hard immediately after lamp removal.
The Bottom Line
Gel nail polish that lasts 3 weeks is a product standard that the professional brands stocked at The Beauty Box consistently meet. Kiara Sky's soak-off range and HEMA-free Gel Pro line, LeChat Perfect Match, Chaun Legend's LGND formula, and Revel Nail all deliver at the three-week benchmark under correct application conditions.
The six things that determine whether you actually reach three weeks are: dehydrating the nail plate before every application; applying thin coats; capping the free edge at every layer; using a 48W+ LED lamp with full cure time; choosing a rubber base coat for clients with oily nails; and removing gel via proper soak-off rather than force. None of them are product-dependent. All of them are within your control.
Start with the prep. Get the prep right. Then choose from the 438 gel polish options at The Beauty Box, pair with a quality base and top coat system, and use a properly-wattaged LED lamp. The three-week result will follow.