Acrylic Nails 101: Professional Application Techniques for Beginners
Walk into any nail salon and you'll see them—flawlessly sculpted acrylic nails in every imaginable shape, length, and design. These durable, versatile enhancements have remained the gold standard in nail artistry for decades, beloved by both professionals and clients for their strength, longevity, and creative possibilities.
If you've ever wondered whether you could create these salon-quality acrylic nails yourself, the answer is absolutely yes. While acrylic application has a reputation for being difficult or complicated, the truth is that anyone can learn this skill with proper instruction, quality products, and dedicated practice. The techniques that professional nail technicians use aren't secret or mysterious—they're learnable, repeatable processes that become easier and more intuitive with each set you create.
This comprehensive guide will take you from complete beginner to confident acrylic nail artist. You'll learn the fundamental chemistry that makes acrylic nails work, master the crucial skill of creating the perfect acrylic bead, understand proper nail preparation protocols, and develop the application techniques that separate amateur attempts from professional results. We'll cover everything from selecting safe, high-quality products to troubleshooting common problems that every beginner encounters.
The investment required to start doing acrylic nails at home is surprisingly modest—typically $80 to $150 for a complete beginner kit. Compare this to salon prices of $60 to $120 for a full set of acrylics, plus $40 to $80 every two to three weeks for fills, and you'll recoup your investment after just two or three applications. Beyond the financial savings, you'll gain a valuable skill that opens up endless creative possibilities and the satisfaction of creating beautiful nail art with your own hands.
Learning acrylic nails does require patience and practice. Your first set probably won't be perfect, and that's completely normal and expected. Professional nail technicians have completed hundreds or thousands of sets before achieving the seemingly effortless results you see in salons. Give yourself permission to be a beginner, focus on improvement rather than perfection, and celebrate the progress you make with each practice session.
Understanding Acrylic Nail Chemistry: The Foundation of Success
Before you pick up a brush and start creating acrylic nails, understanding the basic chemistry of how acrylics work will help you make better decisions and troubleshoot problems when they arise.
Acrylic nails are created through a chemical process called polymerization. You start with two separate components: liquid monomer and powder polymer. When you combine these two products in the right ratio, they undergo a chemical reaction that transforms them from separate liquid and powder into a solid, durable material.
The liquid monomer is exactly what the name suggests—individual molecules that are ready to link together. The powder polymer contains pre-linked chains of these molecules along with other ingredients like pigments for color and initiators that trigger the chemical reaction. When you dip your brush into the liquid monomer and then pick up powder, these two components begin reacting immediately.
The reaction is exothermic, meaning it generates heat. You might feel warmth on your nail during application—this is normal and indicates that the polymerization process is occurring. The heat sensation should be mild; excessive heat can indicate too much product or an overly fast reaction that might compromise the final strength of the acrylic.
Understanding that acrylic formation is a chemical reaction rather than simply "drying" helps explain several important aspects of working with acrylics. First, you have a limited working time—once you create your acrylic bead by combining liquid and powder, the polymerization process begins immediately and continues until the product hardens completely. This working time varies based on several factors including room temperature, the specific product formulation, and the ratio of liquid to powder you use.
Second, the ratio of liquid to powder dramatically affects both the working time and the final properties of the cured acrylic. Too much liquid creates a wet, runny bead that's difficult to control and takes longer to harden. Too much powder creates a dry, crumbly bead that won't blend smoothly and may develop air pockets or weak spots. Finding the perfect consistency is one of the most important skills you'll develop as you learn acrylic application.
Third, you can't reverse or undo the polymerization process once it begins. Unlike gel polish that can be wiped away before curing, acrylic starts hardening the moment liquid touches powder. This makes preparation and planning important—you need to work decisively and efficiently once you begin applying product.
The good news is that this chemical process is remarkably consistent and predictable. Once you understand how to create the right bead consistency and work within your available time window, acrylic application becomes a straightforward, repeatable process that produces reliable results.
EMA vs. MMA: Choosing Safe Acrylic Products
One of the most important decisions you'll make when starting with acrylic nails is selecting safe, high-quality products. The difference between professional-grade and low-quality acrylic systems isn't just about performance—it's fundamentally about safety and nail health.
Professional acrylic systems use EMA (Ethyl Methacrylate) as their primary monomer. EMA has been extensively tested and is approved for cosmetic use. It creates a flexible, durable acrylic that moves slightly with your natural nail, reducing the stress that can cause lifting or cracking. EMA-based acrylics also have a more tolerable odor and are significantly less likely to cause allergic reactions or sensitivity.
In contrast, some low-quality products use MMA (Methyl Methacrylate) as their monomer. MMA is significantly cheaper than EMA, which is why disreputable manufacturers still use it despite the fact that it's banned for nail use in many professional settings. MMA creates an extremely hard, inflexible acrylic that doesn't move naturally with your nail. This rigidity can cause significant damage when the acrylic eventually lifts or breaks, often taking layers of your natural nail with it.
MMA also bonds much more aggressively to the natural nail than EMA, making removal extremely difficult. Many horror stories about acrylic nails damaging natural nails stem from MMA-based products that essentially required the natural nail to be filed down significantly during removal.
The strong, distinctive odor often associated with acrylic nails is much more pronounced with MMA than with EMA-based products. While all acrylic systems have some odor due to the chemical reaction occurring, quality EMA products have a more manageable scent that dissipates quickly.
How can you identify safe EMA-based products? First, reputable manufacturers clearly disclose that their liquid monomer is EMA-based. If a product doesn't specify what type of monomer it contains, that's a red flag. Second, professional brands used in legitimate salons invariably use EMA. Third, extremely cheap acrylic systems are more likely to cut corners with inferior ingredients.
The Kiara Sky EMA Monomer represents the professional standard for acrylic liquid. It's formulated specifically for optimal performance with their acrylic powder systems, creating the ideal balance of working time, strength, and flexibility. While it costs more than bargain-basement alternatives, the difference in safety, performance, and final results makes it an essential investment.
When you're learning a new skill, the last thing you need is fighting against inferior products that make the process harder than it should be. Quality EMA-based acrylic systems are more forgiving for beginners, provide better working time, and create stronger, more natural-feeling results. The few extra dollars you spend on professional products will save you countless hours of frustration and potential damage to your natural nails.
Essential Acrylic Nail Supplies: Building Your Professional Kit
Creating professional-quality acrylic nails requires specific tools and products. While the list might seem extensive at first, each item serves a important purpose in the application process. Investing in quality supplies from the start makes learning significantly easier and produces better results.
Liquid Monomer
Your liquid monomer is one of the two fundamental components of acrylic nails, so quality matters tremendously. Look for a monomer that's explicitly labeled as EMA-based, formulated by a reputable manufacturer, and designed for professional use.
The Kiara Sky EMA Monomer is available in both 16-ounce and 32-ounce sizes. For beginners, the 16-ounce size provides plenty of product while you're learning and deciding if acrylic nails are something you want to pursue long-term. If you're already committed or plan to do nails for friends and family regularly, the 32-ounce size offers better value.
Store your monomer in a cool, dark place away from direct sunlight and heat sources. Keep the bottle tightly sealed when not in use to prevent evaporation and maintain consistent performance. Properly stored monomer can last for years, though most people use it well before it degrades.
One safety consideration with monomer: work in a well-ventilated area. While EMA monomer is much safer than MMA, all acrylic systems produce fumes during the polymerization process. Open a window, use a small fan to circulate air, or work in a room with good natural ventilation. Never work with acrylic in a completely sealed space.
Acrylic Powder
Acrylic powder comes in numerous colors and formulations, but beginners should start with these essential options: clear, pink, and white. These three colors allow you to create natural-looking nail enhancements and the classic pink-and-white French manicure look that remains perpetually popular.
Clear acrylic powder is the most versatile option. It can be used alone for a natural look on people with naturally pink nail beds, layered under colored polish, or combined with other colors for custom effects. Clear powder shows any application imperfections clearly, which actually makes it excellent for learning—you can see exactly where your technique needs refinement.
Pink powder creates a natural-looking nail that mimics the color of healthy nail beds. It's more forgiving than clear for beginners because it camouflages minor imperfections in application. Pink powder comes in various shades from very pale to deeper rose tones, so you can choose the option that most closely matches your natural nail color.
White powder is essential for creating French manicure tips and for specialized nail art techniques. The bright white opacity covers well and provides sharp contrast when used for design work.
As you advance in your skills, you can explore colored acrylic powders, which allow you to create colorful nail enhancements without needing to apply polish on top. Glitter acrylics, shimmer powders, and specialty effect powders offer even more creative possibilities.
Chaun Legend Professional Acrylic Powders are formulated to work seamlessly with quality EMA monomers, creating smooth, strong nails with excellent workability. Their powder range includes beautiful colors and the proper consistency for both beginners and advanced users.
For your initial purchase, one two-ounce container of each color (clear, pink, white) provides enough powder for 20 to 40 full sets depending on your application technique and the length of nails you create. Acrylic powder has an excellent shelf life when stored properly—keep containers tightly sealed and away from moisture.
Acrylic Brushes
Your acrylic brush is arguably the most important tool in your kit. The brush picks up liquid monomer, forms the acrylic bead by collecting powder, and shapes and smooths the product on the nail. Brush quality dramatically affects how easily you can create and manipulate acrylic.
For beginners, a size #8 to #12 brush works best. Smaller brushes give you more control but hold less product, requiring more frequent dipping and powder pickup. Larger brushes hold more product but require more skill to control precisely. A #10 brush represents an excellent middle ground for most beginners.
Kolinsky sable brushes are the professional standard. These natural hair brushes have superior liquid retention, create perfect acrylic beads more easily, and maintain their shape over time. They're more expensive than synthetic brushes, but the investment pays off in easier application and better results. A quality Kolinsky brush, properly cared for, can last for years.
Synthetic brushes are more affordable and can work for learning basic techniques, but they don't perform as well as natural hair. If budget is a concern, consider starting with one good Kolinsky brush rather than multiple cheap synthetic ones.
Brush care is crucial for longevity and performance. After each use, clean your brush thoroughly with monomer, then wipe it on a lint-free cloth or paper towel. Never let acrylic harden in your brush—this essentially ruins the brush and requires replacement. Between uses, store your brush horizontally or hanging with the bristles down to maintain the proper shape.
The Kiara Sky Professional Acrylic Brush collection includes Kolinsky brushes in various sizes, all designed specifically for acrylic application with optimal shape and hair density.
Dappen Dish
A dappen dish is a small glass or plastic container that holds your liquid monomer during application. While this seems like a simple item, choosing the right dappen dish improves your workflow and prevents frustrating spills.
Look for a dappen dish with a wide, stable base that won't easily tip over. A lid is helpful for covering the monomer between applications and preventing evaporation. Glass dappen dishes are easy to clean and don't absorb odors or product, making them preferable to plastic versions.
The Kiara Sky Spill-Proof Dappen Dish features a clever design with a weighted bottom and narrow opening that prevents accidental spills even if you bump it during application. This might seem like a small detail, but when you're focused on creating the perfect acrylic bead, not worrying about knocking over your monomer is genuinely helpful.
Pour only a small amount of monomer into your dappen dish—just enough for your current application, typically about a quarter inch in depth. This minimizes waste if you do spill and prevents monomer from sitting exposed to air for extended periods, which can affect its performance.
Nail Forms vs. Tips
When creating acrylic nails, you have two main methods for extending length beyond the natural nail: nail forms or nail tips. Each method has advantages, and most professional nail technicians are proficient with both.
Nail tips are pre-formed plastic extensions that you glue to the natural nail and then cover with acrylic. Tips are generally easier for beginners because they provide structure and shape automatically. You simply select the right size tip for each finger, glue it on, blend the seam where the tip meets the natural nail, and then apply acrylic over the entire nail including the tip.
Tips come in various shapes including natural, stiletto, coffin, and square, allowing you to create different looks easily. They're excellent for clients who want consistent shape and substantial length. The main downside is that tips are less customizable than forms—you're limited to the shapes available, and creating very long extensions with tips can be challenging.
Nail forms are flexible guides that fit under the free edge of the natural nail, creating a template for building the acrylic extension. Forms allow for complete customization of length and shape, create a more natural-looking nail without the seam that tips have, and can be removed once the acrylic hardens, leaving a smooth nail from end to end.
However, forms require more skill to position correctly and to build proper structure on. Many beginners find forms frustrating initially because creating a nice shape without the guide that a tip provides takes practice and a good eye for structure.
For learning purposes, start with tips. They remove several variables from the process, allowing you to focus on mastering acrylic consistency, application technique, and shaping. Once you're comfortable with the basics, you can progress to using forms for more advanced applications.
Files and Buffers
Shaping and refining acrylic nails requires files in several different grit levels. Understanding which grit to use for which purpose helps you work efficiently and achieve professional results.
An 80-grit or 100-grit file is your heavy-duty workhorse for removing bulk, shortening length, and doing major shaping. This very coarse file removes product quickly, which is exactly what you want when you need to fix a mistake or reduce length significantly. However, it's too aggressive for final shaping or working near the natural nail, as it can cause heat and damage.
A 150-grit or 180-grit file is your primary shaping tool. After the initial rough work with your coarse file, you'll use this medium grit to refine the shape, smooth the surface, and create the proper contours. This is the file you'll use most frequently during the shaping process.
A 240-grit file or buffer is for final smoothing before polish application. This fine grit removes tiny imperfections and creates a smooth surface that's ready for color or allows the acrylic to be buffed to a high shine if you're leaving nails unpolished.
Electric nail files (e-files) are advanced tools that professional nail technicians use to work more quickly and efficiently. While they can be helpful, beginners should master hand filing first. E-files require specific training to use safely—improper use can cause serious nail damage through heat or aggressive filing. Once you're proficient with hand files and understand proper filing technique, you can explore e-files if you want to work more quickly.
Prep and Finish Products
Just as with gel manicures, proper nail preparation is crucial for acrylic adhesion and longevity. You'll need several products to prep nails before acrylic application.
Nail dehydrator removes oils and moisture from the nail surface. Since acrylic adheres to the nail through chemical bonding, any barrier like oil or moisture prevents proper adhesion and leads to lifting. Apply dehydrator after all other prep work is complete, just before beginning acrylic application.
Primer creates an extra layer of adhesion between the natural nail and acrylic. Two types of primer exist: acid-based and acid-free. Acid-based primers are very strong and provide excellent adhesion, but they can burn if they touch skin and require careful application. Acid-free primers are safer for beginners and still provide good adhesion when proper prep is done. Many modern acrylic systems work beautifully without primer if nail prep is meticulous, so primer is optional rather than essential.
Pure acetone is necessary for removal and cleanup. You'll use acetone to clean any acrylic off your tools, fix mistakes before the product hardens, and eventually remove the acrylic nails when it's time for a fill or a fresh set.
Cuticle oil should be applied after every acrylic service to restore moisture to the cuticles and surrounding skin. The acrylic application process is drying, and healthy cuticles help maintain the longevity of the enhancement.
Safety Equipment
Working with acrylic requires attention to safety, particularly regarding ventilation and dust management.
A quality dust mask or respirator protects your lungs from acrylic dust created during filing. The fine particles from filing acrylic are not something you want to breathe repeatedly. A simple disposable dust mask provides basic protection, while a proper respirator with replaceable filters offers superior protection for regular use.
Proper ventilation is essential when working with acrylic. The fumes from the monomer and the dust from filing both require good air circulation. Work near an open window with a small fan directing fumes away from your face, or consider a small nail dust collector that filters air as you work.
Safety glasses protect your eyes from flying debris during filing and prevent accidental splashes of liquid monomer. While not absolutely essential for careful hobbyists, safety glasses are standard practice in professional salons.
A table covering or towel protects your work surface from spills, dust, and product. Acrylic can damage some surfaces, so working on a protected area prevents accidents from becoming expensive mistakes.
Investment Breakdown
A complete beginner kit including all essentials typically costs $80 to $150. Here's a realistic breakdown:
-
EMA Monomer (16 oz): $30-45
-
Acrylic powders (3 colors, 2 oz each): $30-60
-
Professional acrylic brush: $15-30
-
Dappen dish: $5-10
-
Nail tips or forms: $5-15
-
File set (multiple grits): $10-20
-
Nail dehydrator and prep: $10-15
-
Basic tools (cuticle pusher, clipper, etc.): $10-20
Compare this initial investment to professional salon prices: a full set of acrylic nails costs $60 to $120, with fills every two to three weeks at $40 to $80. Your DIY kit pays for itself after creating just two or three sets, and each subsequent application costs only $3 to $7 in product.
Preparing Natural Nails for Acrylic Application
Proper preparation is absolutely critical for successful acrylic nails. While you might be tempted to rush through prep to get to the exciting part of creating beautiful nails, cutting corners during preparation guarantees poor results and premature lifting.
Professional nail technicians know that at least 80% of lifting problems stem from inadequate preparation. Spending an extra few minutes on thorough prep prevents hours of frustration later when your beautiful acrylic nails start lifting after just a few days.
Start by completely removing any existing nail product. If you have old acrylic, gel polish, or regular polish, remove it completely using the appropriate method. Your natural nail must be completely clean and bare before you begin.
Use your nail file to shape the free edge of your natural nails. You don't need to file them very short, but removing any length beyond a couple millimeters of free edge makes acrylic application easier and creates more natural-looking results. Very long natural nails under acrylic can create stress points that make lifting more likely.
File the free edge in one direction only, moving from the side toward the center. Avoid the sawing back-and-forth motion that creates microscopic tears in the nail edge. These tears can propagate up into the nail, causing splitting and damage.
Now address your cuticles. Push them back gently using a cuticle pusher, working carefully around the entire base of each nail. You're not trying to remove the cuticle—just push it back so it's not sitting on the nail plate where you'll be applying acrylic. Applying acrylic over the cuticle creates a weak point where lifting almost always begins.
If you have significant excess cuticle tissue or hangnails, carefully trim these with cuticle nippers. However, exercise restraint. Aggressive cuticle cutting creates soreness, potential infection points, and actually makes the cuticle grow back thicker and more prominent. Remove only obviously dead, ragged tissue.
Next comes the most misunderstood step in nail preparation: buffing the natural nail surface. Many beginners believe they need to aggressively file down the natural nail to create texture for adhesion. This is completely wrong and extremely damaging.
You want to very lightly remove the natural shine from the nail plate using a fine buffer (180-grit or finer). The goal is simply to scuff away the slick outer layer—you're not trying to thin the nail, create visible scratches, or make the surface rough. If you can see white dust coming from your natural nails (as opposed to dust from old polish), you're buffing too aggressively.
Think of it this way: you're preparing the nail surface the same way you'd lightly sand painted wood before repainting. Just enough to break the seal of the shiny surface, but not nearly enough to damage the underlying structure.
After buffing, brush your nails meticulously with a clean nail brush. Every particle of dust must be removed—any dust trapped under acrylic creates weak spots and imperfections. Brush the nail surface, under the free edge, and around the cuticles and sidewalls.
Use a lint-free wipe dampened with acetone or 99% isopropyl alcohol to cleanse each nail thoroughly. This removes any remaining dust, natural oils, or residue. Allow the nails to air dry completely—introducing wet nails to acrylic monomer dilutes the product and compromises adhesion.
The final preparation step is applying nail dehydrator. Pour a small amount onto a cotton pad or use a brush applicator if your dehydrator has one, and apply a thin coat to each nail. You'll see the nail surface change from slightly shiny to completely matte as the dehydrator removes oils and moisture. Allow this to dry completely before proceeding.
Critical reminder: once you've applied dehydrator, do not touch your nails with your fingers. Any oil transfer from your skin undoes the dehydration process. If you need to adjust anything, use an orange stick or tool rather than your fingertips.
If you're using primer, apply it now according to the manufacturer's instructions. Acid-free primer can be applied to the entire nail surface. Acid-based primer should be applied very carefully only to the natural nail, avoiding any skin contact. Use the minimum amount necessary—more primer doesn't mean better adhesion, and excess primer can actually interfere with bonding.
With your nails properly prepared, you're ready to begin acrylic application. The time you've invested in thorough preparation pays off with better adhesion, longer wear, and fewer problems throughout the life of the enhancement.
Mastering the Perfect Acrylic Bead: Your Most Important Skill
Everything in acrylic application hinges on your ability to create and control the perfect acrylic bead. The consistency of your bead determines how easily you can work with it, how smoothly it applies, how quickly it sets, and ultimately how strong and beautiful your finished nails look.
Understanding bead consistency is one of those skills that seems mysterious and complicated when you're watching someone else do it, but becomes clear and manageable once you understand what you're looking for and get some hands-on practice.
The Three Bead Consistencies
Every acrylic bead falls somewhere on a spectrum from too wet to too dry, with a perfect consistency somewhere in the middle. Learning to recognize these consistencies by sight and feel is your path to acrylic mastery.
A bead that's too wet contains excessive liquid monomer relative to powder. It looks very glossy and almost translucent, flows readily across the nail surface, and doesn't hold its shape well. When you place a wet bead on the nail, it spreads and runs toward the cuticles and sidewalls without much control. Wet beads take longer to set, giving you extended working time but making precise placement and shaping difficult.
Wet beads also create another problem: they're weak when cured. The excessive liquid doesn't have enough powder to react with, leaving voids and soft spots in the final product. Nails made with consistently wet beads will be flexible, prone to breaking, and may never fully harden.
Beginners often create wet beads because they're trying to give themselves more working time by using extra liquid. While this seems logical, it actually makes application harder because the product won't stay where you put it.
A bead that's too dry contains too much powder relative to liquid. It looks dull and chalky rather than glossy, feels crumbly or grainy, and sets very quickly—often too quickly to properly shape and smooth it. Dry beads don't blend or self-level, leaving visible texture and requiring excessive filing to smooth.
When you try to press and shape a dry bead, it may separate or develop cracks. It doesn't adhere well to previously applied acrylic, creating visible lines between beads rather than blending seamlessly. Nails created with dry beads often have a bumpy, uneven surface and may contain air pockets that create weak spots.
The perfect bead consistency is smooth and satin-like in appearance—not super glossy but not dull and chalky. It holds its shape when picked up on the brush but flows smoothly when pressed onto the nail. When you touch the bead with your brush, it should be easy to manipulate and spread but shouldn't run uncontrollably.
A perfect bead makes a slight clicking or snapping sound when it forms on the brush. This sound, combined with the visual cues, tells you that you've achieved the ideal ratio. The bead should look like it has substance and body—it forms a small ball on your brush rather than either dripping off or refusing to come together.
The working time with a perfect bead is typically one to two minutes, giving you enough time to place and shape it without rushing but encouraging efficient work. As you press and smooth the bead, it should level out nicely, filling in where you want coverage while maintaining structure where you're building shape.
Creating Your First Beads
The best way to learn bead consistency is through dedicated practice before attempting a full application on actual nails. Set up a practice area with some spare nail tips or even just a piece of acetate or glass where you can practice bead formation without the pressure of creating a finished nail.
Dip your brush into your monomer, saturating the bristles but not dripping. Wipe the brush gently against the inside of your dappen dish to remove excess liquid—you want the brush wet but not dripping. The brush should glisten with liquid but shouldn't have monomer running off it.
Now press the tip of your brush into your acrylic powder. Don't scrub or swirl the brush through the powder—just press straight down, then lift straight up. The liquid in your brush will cause powder to adhere, forming a small ball on the tip of your brush.
Look at what you've created. Is it super wet and glossy? You had too much liquid on your brush or didn't pick up enough powder. Try again, using a bit less liquid or picking up powder from a deeper point in the container.
Is it chalky and dry-looking? You didn't have enough liquid on your brush, or you picked up too much powder. Next time, start with a more saturated brush or pick up less powder.
When you achieve a bead that looks right—smooth, satin finish, holds together in a small ball—gently tap it onto your practice surface. A perfect bead will spread slightly and self-level, creating a smooth puddle. If it runs everywhere, it's too wet. If it just sits there in a clump, it's too dry.
Practice creating 20 or 30 beads in a row, focusing on consistency. Can you create the same perfect bead reliably, or are you getting random results? This repetitive practice builds muscle memory for how your brush should feel when it has the right amount of liquid and how much powder to pick up.
The Sound Test
Professional nail technicians often mention the "click" or "snap" of a perfect bead. This subtle sound comes from the powder and liquid combining in the right ratio, and it's a helpful confirmation that you've got the consistency right.
When you press your brush into the powder with the proper amount of liquid, you'll hear a very slight clicking sound as the bead forms. It's not loud—more of a delicate tap or snap. This sound, combined with the visual appearance of the bead, gives you confidence that you're working with the right consistency.
Don't worry if you don't hear it at first. As you practice and start creating better beads, you'll begin to notice this sound and recognize it as confirmation of correct technique.
Timing and Temperature
The environment where you work affects your acrylic beads. Temperature, humidity, and air circulation all influence how quickly acrylic sets.
In a warm room, your beads will set faster, giving you less working time. In a cool room, they set more slowly, giving you more time to work but potentially allowing the product to flow more than you want.
Most acrylic systems are formulated to work well at normal room temperature (68-75°F or 20-24°C). If your workspace is significantly warmer or cooler, you may need to adjust your liquid-to-powder ratio slightly. Warmer temperatures call for slightly wetter beads to compensate for faster setting; cooler temperatures allow for slightly drier beads.
Humidity also plays a role. Very humid conditions can slow the setting process and make acrylic feel tacky. Very dry conditions may speed it up. Again, small adjustments to your bead consistency can compensate for environmental conditions.
Practice Exercises
Before attempting a full set of acrylic nails, dedicate serious practice time to mastering bead creation and control. Here are some exercises that build your skills systematically:
Exercise 1: Create 30 beads in a row, focusing on consistent size and appearance. Place each bead on a nail tip or practice surface and let it cure. This builds your muscle memory for the right amount of liquid and powder.
Exercise 2: Create a bead and practice spreading and shaping it with your brush before it sets. Learn how the bead responds to pressure, how to coax it into position, and how to smooth the surface. This builds your handling skills.
Exercise 3: Practice creating beads of different sizes. A small bead for the cuticle area, a medium bead for the body of the nail, a larger bead for building apex. Being able to create the appropriate size bead for each zone improves efficiency and results.
Exercise 4: Practice creating multiple beads and placing them adjacent to each other, blending the edges together seamlessly. This mimics the actual process of building a nail where multiple beads must merge into one smooth surface.
These practice sessions might feel tedious, but they're the foundation of your success. Every professional nail technician has spent hours doing exactly this kind of practice. The skills you build here transfer directly to creating beautiful acrylic nails.
Acrylic Application Methods: Choosing Your Technique
When you're ready to start creating actual acrylic nails, you'll choose between two primary methods: applying acrylic over nail tips or sculpting acrylic on nail forms. Both techniques have their place in professional nail artistry, and skilled technicians are proficient with both.
Using Nail Tips: The Beginner-Friendly Approach
Applying acrylic over nail tips is generally easier for beginners because the tip provides structure and shape automatically. You start with a pre-formed extension that gives you the basic silhouette you want, then use acrylic to strengthen it, blend the seam between tip and natural nail, and create professional-looking enhancements.
Tips come in various shapes including natural (a gentle curve that mimics natural nail shape), square (straight sides with a square tip), stiletto (dramatically tapered to a point), coffin or ballerina (square tip with tapered sides), and almond (tapered sides coming to a rounded point). For learning purposes, start with natural or square shapes as these are most forgiving and easiest to work with.
Tips also come in different sizes to fit different nail widths. A properly sized tip covers the nail from sidewall to sidewall without overlapping the skin on either side. Most tip sets include 10 to 12 sizes, and selecting the right size for each nail is crucial for natural-looking results.
The main advantage of tips for beginners is that they remove the challenge of creating shape and structure from scratch. You can focus entirely on mastering acrylic consistency and application technique without simultaneously trying to build perfect curves and shapes.
The disadvantage of tips is that they create a seam where the plastic tip meets the natural nail. Properly blending this seam so it's invisible is a skill in itself, and rushed or improper blending creates a visible line or bump that looks amateurish.
Using Nail Forms: The Advanced Technique
Nail forms are flexible guides that fit under the free edge of the natural nail, creating a template for sculpting the acrylic extension without using plastic tips. Forms allow for complete customization of length and shape, create absolutely no seam or demarcation line, and can be removed once the acrylic cures, leaving a smooth nail with a natural underside.
The skill required to use forms successfully is significantly higher than with tips. You must position the form perfectly under the free edge, secure it without creating gaps or unevenness, and then sculpt the acrylic extension freehand, creating proper shape and structure from nothing but product and technique.
Forms excel for creating very long extensions, customized shapes that don't match standard tip shapes, or when the client's natural nails have unusual shapes that standard tips don't fit well. Many professional nail technicians prefer forms for their flexibility and the seamless results they create.
For beginners, attempting forms before mastering tips usually leads to frustration. The additional challenges of form positioning and freehand sculpting, combined with still learning basic acrylic consistency and application, can be overwhelming. Most educators recommend becoming proficient with tips before progressing to forms.
Making Your Choice
For your first several practice sets, use tips. They provide the best learning environment for developing your core skills with acrylic consistency, bead placement, and surface finishing. Once you can consistently create smooth, properly shaped acrylic nails over tips, you'll have the foundational skills needed to progress to forms if you want to expand your capabilities.
Step-by-Step Acrylic Application on Tips
Now we'll walk through the complete process of applying acrylic nails over tips, from tip application through final finishing. This is a comprehensive procedure that will take considerable time when you're learning—expect your first full set to require two to three hours. As you gain experience and confidence, you'll work more efficiently, eventually completing a full set in 60 to 90 minutes.
Step 1: Apply and Blend Nail Tips
Begin by selecting the appropriate size tip for each nail. Hold the tip against the natural nail—the proper size covers the nail from sidewall to sidewall without overlapping onto the skin. If you're between sizes, choose the slightly smaller tip rather than the larger one.
Apply a small drop of nail tip glue to the well of the tip (the curved area on the underside that fits over your natural nail). You want enough glue to create adhesion but not so much that it squeezes out excessively when you press the tip on.
Position the tip at approximately a 45-degree angle to the nail, with the bottom edge just shy of your cuticle area. Press down firmly, holding steady pressure for 10 to 15 seconds while the glue bonds. The tip should form a smooth continuation of your natural nail without any gap between the natural nail edge and the inside of the tip.
Once the glue has set on all ten nails (or five if you're working one hand at a time), use a nail clipper to cut the tips to approximately the length you want your finished nails to be. Leave them slightly longer than your target length to allow for filing and shaping.
Now comes the crucial blending step. Use a medium-grit file (150-180 grit) to carefully file away the seam where the tip meets your natural nail. You're essentially thinning the tip at this junction so the transition from natural nail to tip is imperceptible.
File at a slight downward angle, removing the lip of the tip where it sits on the natural nail. Test the smoothness by running your finger across the seam—you shouldn't feel any ledge or step. The transition should be completely smooth. Take your time with this step; proper blending is essential for professional-looking results.
Also file the underside of the free edge if necessary, smoothing any rough edges from cutting and ensuring the tips feel comfortable with no sharp spots.
Step 2: Shape the Extension
With your tips applied and blended, shape them to your desired nail shape. Use your file to create straight sides for square nails, tapered sides for oval or almond shapes, or whatever silhouette you're aiming for.
Check that both hands are symmetrical. Hold them up together and compare the lengths and shapes. Uneven nails are one of the most obvious signs of amateur work, so invest time in getting matching shapes on both hands.
File the free edge to create a smooth, even tip. For square nails, the corners should be crisp but not sharp. For round or oval shapes, ensure the curves are smooth and symmetrical.
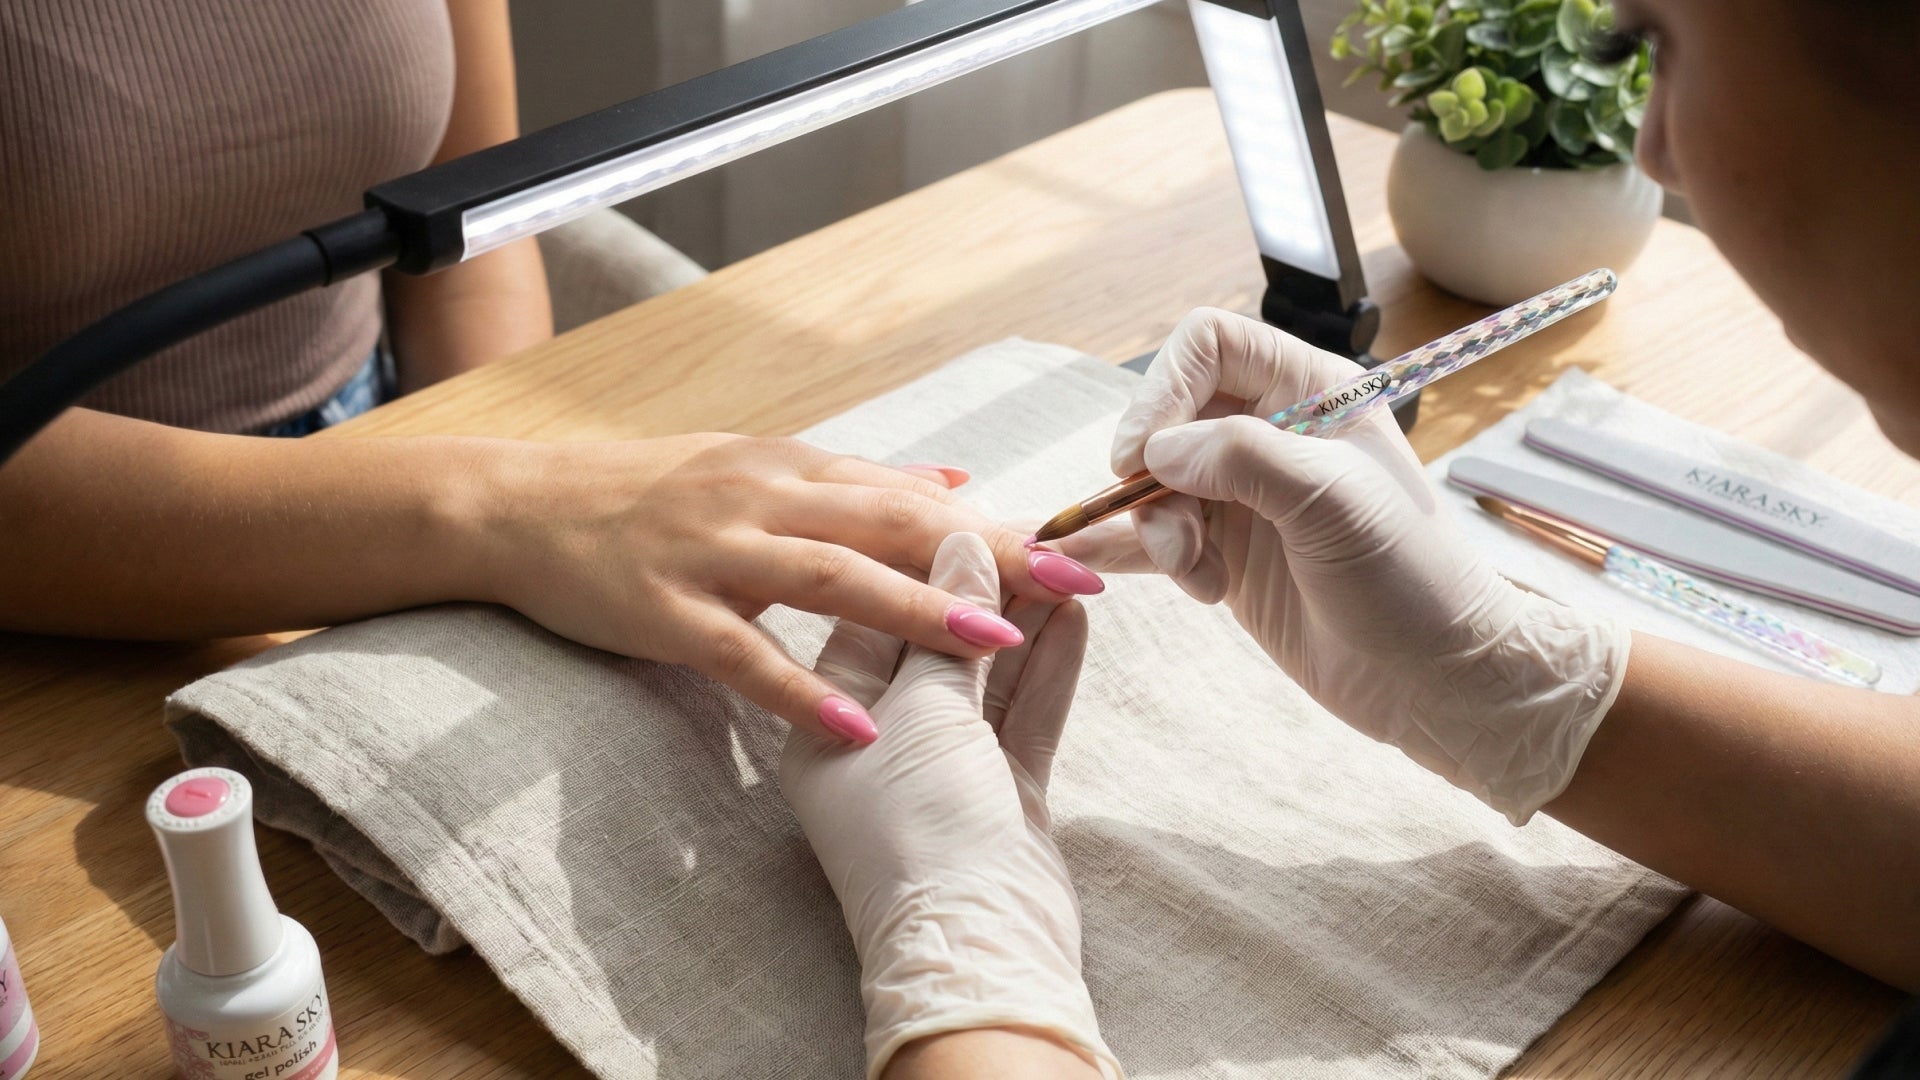
Step 3: Apply First Acrylic Bead (Cuticle Area)
Now you're ready to begin applying acrylic. Start at the cuticle area of the nail using a small to medium bead. This first bead is crucial because any flooding at the cuticle creates lifting problems later.
Create your bead with the perfect consistency you've practiced. Place it on the nail plate about halfway between the cuticle and the middle of the nail—not right at the cuticle line. Press gently with your brush to flatten the bead slightly, then use the brush to coax the product toward (but not onto) the cuticle.
You want to leave a hair's width of space between the acrylic and your actual cuticle. This micro-gap prevents flooding while being small enough that it's invisible to the eye. As you press and smooth the bead, also guide it gently toward the sidewalls, creating coverage across the width of the nail.
Work quickly but smoothly—you have about 60 to 90 seconds from bead creation until it becomes too firm to manipulate easily. Use pressing motions rather than brushing or stroking, as pressing prevents pulling up product you've already placed.
Step 4: Apply Middle Bead (Building the Apex)
The apex is the highest point of the nail, typically located about one-third of the way back from the free edge toward the cuticle. This is the nail's stress point—where force is concentrated when you press on or bump the free edge. Building proper apex strength is critical for durability.
Create a medium-sized bead and place it in the middle third of the nail. Press and shape it to build height at the apex while blending smoothly with your first bead at the cuticle end and tapering toward the free edge.
The apex should create a gentle arch from cuticle to tip when you view the nail from the side. Too flat and the nail is weak; too much arch and it looks bulky and unnatural. Getting the apex right is one of the skills that separates beginner work from professional results.
As you shape this bead, blend it carefully with your first bead so there's no visible line or demarcation where they meet. The two beads should merge into one smooth surface.
Step 5: Apply Free Edge Bead
Your final bead covers the tip and free edge, capping everything together and sealing the vulnerable end of the nail. The size of this bead depends on how much of the tip isn't yet covered and how much length you're working with.
Place the bead on the top surface of the tip, then press and smooth it to completely cover the tip. Make sure product wraps over the very edge of the free edge—this capping is essential for preventing chips and breaks.
Also ensure product covers the sidewalls of the tip, creating seamless coverage all the way to the edges. Any exposed tip plastic is a weak point and looks unfinished.
Blend this final bead smoothly with your previous product, ensuring there are no lines, bumps, or demarcations anywhere on the nail surface.
Step 6: Allow Product to Cure
Acrylic needs 2 to 3 minutes to fully cure once you've finished shaping it. You'll know it's ready when you tap it with your brush and hear a solid clicking sound rather than a dull thud. Fully cured acrylic is rock hard; any flexibility indicates it needs more time.
During curing, avoid touching or disturbing the product. Movement during the curing process can create weak spots or surface imperfections.
Step 7: File and Shape
Once all ten nails are applied and fully cured, begin the filing and shaping process. This is where you refine your work from chunky, rough acrylic applications into smooth, beautifully shaped nails.
Start with your coarse file (80-100 grit) to remove bulk and do heavy shaping. File the overall nail shape, ensuring length is correct and sides are symmetrical. Create the sidewall contours, making sure they're smooth curves without bumps or irregularities.
Work on the apex, filing to create that gentle arch from cuticle to tip. The apex should be subtle—you shouldn't see a sharp ridge or bump, just a gentle rise at the strongest point of the nail.
File the surface smooth, removing any texture, bumps, or lines between beads. Your goal is a completely smooth nail surface that looks like one continuous piece rather than several beads joined together.
Switch to your medium file (150-180 grit) to refine your shaping and smooth the surface more carefully. This grit removes the coarse scratches from your heavy file while continuing to perfect the shape.
Finally, use your fine file or buffer (240+ grit) to smooth the entire surface to near-polish perfection. After this final buffing, your nails should have a slight sheen and feel completely smooth to the touch.
Step 8: Final Cleanup and Finish
Use your brush or a damp lint-free wipe to remove all dust from the nail surface and surrounding skin. Dust left on nails creates a cloudy appearance and prevents proper adhesion if you're applying polish.
Check your work carefully. Look at each nail from multiple angles—straight on, from the side, from underneath. Do they look smooth and professional? Are the shapes symmetrical between hands? Is the length even?
Apply cuticle oil generously to each nail, massaging it into the cuticle area and skin around the nail. This instant moisturizing helps counteract the drying effects of the application process and keeps cuticles healthy.
If you're leaving the nails unpolished, you can buff them to a high shine using progressively finer buffers, ending with a very fine buffer (1000+ grit) that creates a glass-like shine. Alternatively, apply base coat, color, and top coat just as you would on natural nails.
Advise your client (or remind yourself) to avoid getting hands wet for at least an hour after application. While the acrylic is fully cured, giving it this settling time ensures maximum durability and adhesion.
Common Acrylic Nail Mistakes and How to Avoid Them
Every beginner makes mistakes when learning acrylic nails. Understanding the most common errors and how to prevent them accelerates your learning and helps you avoid frustration.
Lifting from the Nail Bed
Lifting occurs when the acrylic separates from the natural nail, creating a gap where moisture, dirt, and bacteria can accumulate. It's not only unsightly but can lead to nail infections if not addressed promptly.
The most common cause of lifting is inadequate nail preparation. If you skip or rush through dehydrator application, don't remove all dust after filing, or don't properly push back cuticles, the acrylic lacks a clean surface to bond to.
Flooding the cuticle is the second major cause of lifting. When you apply acrylic right up to or onto the cuticle, the product bonds to that dead tissue. As the cuticle naturally grows and moves, it pulls the acrylic with it, creating separation from the nail plate.
Overly thick or thin product can also contribute to lifting. Very thick acrylic doesn't adhere as well to the natural nail because the bond is happening through a thick layer of product rather than directly to the prepared nail. Very thin acrylic is weak and prone to flexing away from the nail when stressed.
To prevent lifting, be meticulous with preparation, maintain that tiny gap between acrylic and cuticle, apply proper product thickness (not too thick, not too thin), and ensure your bead consistency is correct rather than too wet or dry.
If you notice slight lifting beginning, you can sometimes extend the life of your acrylic by carefully filing away the lifted product, cleaning the area thoroughly, and applying fresh acrylic to fill the gap. However, proper prevention through good technique is always preferable to repairs.
Air Bubbles in Acrylic
Air bubbles appear as small holes or pockets in the cured acrylic. They're usually caused by one of three issues: tapping or patting the brush excessively when applying product, using beads that are too dry and crumbly, or contaminating your monomer with old product.
When you tap your brush on the nail instead of using smooth pressing motions, you can trap air under the product. Similarly, very dry beads that won't smooth out properly often have air pockets trapped within them.
Prevent bubbles by using smooth application technique without excessive tapping, maintaining proper bead consistency, keeping your monomer clean and fresh, and pressing product firmly to eliminate any air pockets.
Small bubbles are mostly cosmetic issues that can be filed away during shaping. Large or numerous bubbles can create weak spots in the nail structure and should be avoided through proper technique.
Weak or Breaking Nails
If your acrylic nails break easily or feel flexible rather than rigid, several factors might be responsible. Consistently using beads that are too wet creates acrylic that never fully hardens, leaving it weak and prone to breaking. Failing to build a proper apex means the nail lacks strength at its critical stress point. Creating nails that are too thin provides inadequate structure and durability.
The solution is mastering proper bead consistency (not too wet), building appropriate thickness at the apex (the nail should have subtle height about one-third back from the free edge), and ensuring overall product thickness is adequate without being bulky (roughly the thickness of a credit card at the sidewalls, slightly thicker at the apex).
If your nails consistently break at the same point—usually where the natural nail ends and the tip/extension begins—the culprit is often inadequate blending of the tip or insufficient product coverage at that junction. Strengthening this stress area with slightly more product at the apex helps prevent breaks.
Yellowing Over Time
White or light-colored acrylic may yellow over time due to several factors. UV exposure from sunlight is the most common cause—acrylic that's exposed to sun repeatedly can develop a yellow tint. Smoking cigarettes exposes nails to chemicals that cause yellowing. Some beauty products like tanning lotions or harsh cleaning chemicals can also discolor acrylic.
Using inferior quality acrylic products sometimes results in yellowing even without external exposure. Professional-grade products like Kiara Sky and Chaun Legend resist yellowing better than cheap alternatives.
To minimize yellowing, apply a UV-protective top coat if you spend significant time in sun, wear gloves when using harsh chemicals or cleaning products, and invest in quality acrylic products that resist discoloration.
Some slight yellowing over time is normal and doesn't indicate a problem. Significant yellowing within days or weeks suggests product quality issues or excessive exposure to discoloring substances.
Excessive Filing Needed
If you find yourself filing endlessly to smooth and shape your acrylic nails, you're likely creating beads that are too wet. Overly wet beads spread excessively and create thick, uneven product application that requires extensive filing to refine.
The solution is creating slightly drier beads with better consistency. Proper beads require minimal filing—just enough to refine the shape and smooth any minor imperfections. If you're filing for 20 minutes per nail, your application technique needs adjustment.
Remember that every stroke of the file removes product that you worked to apply and weakens the overall structure slightly. Less filing is always better, which means better application technique is the goal.
Painful Application
Acrylic application shouldn't hurt. If your client (or you) experiences pain or strong burning during application, something is wrong. The most common cause is flooding the cuticle area with monomer. Liquid monomer touching skin creates a burning sensation and can cause irritation or chemical burns.
True allergic reactions to acrylic are possible but relatively rare with quality EMA products. If you experience consistent redness, itching, swelling, or pain during or after application, discontinue use and consult a healthcare professional—you may have developed sensitivity to acrylic products.
Excessive heat during curing can also cause discomfort. Very thick product or very large beads generate more heat during polymerization. If the heat becomes uncomfortable, you may be using too much product at once.
Improper primer use—particularly over-applying acid-based primer or allowing it to touch skin—can cause burning. Always use primer sparingly and carefully.
To prevent pain, avoid flooding cuticles with monomer, use appropriate bead sizes that don't generate excessive heat, apply primer carefully and minimally, and discontinue use if you experience persistent discomfort or signs of allergic reaction.
Filing and Shaping Techniques for Perfect Acrylic Nails
Professional shaping and finishing separates amateur acrylic nails from salon-quality results. Understanding proper filing technique, grit progression, and how to create beautiful shapes transforms rough acrylic applications into polished, refined nail enhancements.
Understanding File Grits
Nail files are rated by grit—the number of abrasive particles per square inch. Lower numbers mean coarser files that remove product quickly; higher numbers mean finer files that smooth and refine. Using the right grit for each stage of shaping makes your work more efficient and produces better results.
An 80-grit file is extremely coarse and removes acrylic very quickly. Use this only for major product removal, significant shortening, or fixing substantial mistakes. It's too aggressive for final shaping or work near the natural nail.
A 100-grit file offers slightly less aggressive product removal while still working quickly. This is your workhorse for initial shaping after product application—shortening length, removing bulk, and rough shaping of sidewalls and free edge.
A 150-180 grit file is your primary finishing file. After heavy shaping with coarser files, this medium grit refines the shape, smooths the surface, and prepares nails for final polishing. You'll use this grit most frequently during the shaping process.
A 240+ grit file or buffer creates the final smooth surface. After all shaping is complete, this fine grit removes any remaining imperfections and creates a surface ready for polish or a final high-shine buff.
Filing Technique Best Practices
Always file in one direction rather than using a back-and-forth sawing motion. Filing in one direction creates smoother results and prevents heat buildup that can damage the natural nail or cause discomfort.
Apply gentle, even pressure. You don't need to press hard—let the file's abrasive surface do the work. Excessive pressure creates heat, causes hand fatigue, and doesn't actually remove product faster.
File in long, smooth strokes rather than short, choppy movements. Long strokes create even results; short strokes often create ripples or unevenness.
Check your progress frequently. It's easy to file too much and harder to add product back, so shape conservatively and check your work often.
Keep your file moving around the nail rather than focusing on one spot too long. Overworking one area creates thin spots, unevenness, or even damage to the natural nail underneath.
Creating the Perfect Apex
The apex—the highest point of the nail structure—should be located approximately one-third of the way back from the free edge toward the cuticle. This positioning creates a natural arch that's both attractive and structurally sound.
To check your apex placement, look at the nail from the side. You should see a gentle rise starting at the cuticle area, peaking at the apex, and gently declining toward the free edge. The curve should be subtle—not a sharp hump or ridge.
File the apex carefully to create this shape. If your apex is too far forward (toward the free edge), the nail looks bulky and unnatural. If it's too far back (toward the cuticle), the nail is weak at the critical stress point. If there's no apex at all (the nail is flat), it lacks strength and doesn't look natural.
The apex should blend smoothly into the rest of the nail structure without any sharp transitions or visible demarcations. When viewed from above, you shouldn't be able to see where the apex is—it should only be visible in the side profile.
Shaping Different Nail Styles
Square nails have straight sidewalls that meet the free edge at 90-degree angles. The corners should be sharp but not pointed—file them very slightly to remove any truly sharp points that could catch on things, but maintain the overall square appearance.
Squoval nails are square with rounded corners. File the nail square first, then gently round the corners by filing at a 45-degree angle on each corner, creating a softer look while maintaining most of the square shape.
Oval nails feature curved sidewalls that taper gently toward the free edge, which forms a rounded oval shape. File the sidewalls in smooth curves, ensuring both sides are symmetrical, and create a gentle rounded free edge.
Almond nails have more dramatically tapered sidewalls that come to a rounded point. This elegant shape requires longer nails to look proper—on very short nails, almond shaping looks more like oval. File the sidewalls with increased taper and bring them to a soft point at the free edge.
Stiletto nails are dramatically pointed, with heavily tapered sides meeting at a sharp point. These require significant length and skill to create properly. File the sidewalls at sharp angles and bring them to a distinct point at the center of the free edge.
Coffin or ballerina nails are tapered like stiletto nails but have a straight, squared-off tip instead of a point. File the sidewalls with dramatic taper, then create a small square tip at the end.
Refining the Cuticle Area
Pay special attention to the cuticle area during filing and shaping. This area is most visible and any imperfections here are immediately obvious.
Use a fine file or buffer to very carefully smooth the product near the cuticle. You want a thin, smooth taper from the thick acrylic down to the natural nail, with no visible ridge or ledge where acrylic meets natural nail.
Be extremely careful not to file the natural nail or skin. Work conservatively near the cuticles, using light pressure and frequent checks to avoid over-filing.
Sidewall Refinement
The sidewalls should be smooth, symmetrical curves (or straight lines for square nails) with no bumps, flat spots, or irregularities. Hold the hand up and look at it from various angles to check sidewall symmetry.
File sidewalls using long strokes from cuticle to free edge, maintaining even pressure throughout the stroke. This creates smooth, flowing lines rather than uneven or choppy results.
Ensure both sidewalls on each nail are symmetrical to each other, and that all ten nails have consistent shape when viewed together.
Final Surface Smoothing
After all shaping is complete, use your finest buffer to smooth the entire nail surface to a near-polish finish. Work over the whole nail, removing any fine scratches from previous filing and creating a silky-smooth surface.
If you're leaving nails unpolished, you can continue buffing with progressively finer buffers (up to 4000+ grit) to create a high-gloss shine that rivals polished nails. This buffed finish looks natural and professional.
Remove all filing dust completely before applying polish or finishing products. Any residual dust creates a cloudy appearance and prevents proper polish adhesion.